Background

Showing posts with label Thin Cuts. Show all posts

Monday, January 9, 2017

Make It Monday

   Good Morning, everyone! I hope you all had a great weekend, and stayed warm/safe with the crazy weather and cold temps going around the states right now.

   I have been meaning to post a couple projects I did in December, but with the holidays I never had a chance to get them posted. Well today is your lucky day to see them! So consider today a Make It Monday/Throw Back Thursday combo-type of post! hehe

   I made these two projects as prizes for my husband's work Christmas party. They were a ton of fun to make, but, also, I had to throw them together quite quickly with all the other things on my December to-do list! 

   This first project was inspired by a fellow consultant, Donna Cosgrove, and her tree project she posted on Instagram! I purchased 3 paper mache trees from Hobby Lobby, spray painted them white, and decorated them using Oh Deer papers and papers from an old DCWV Collection called Winter in the Woods.

I forgot to take decent pictures of these at home, and had to snap this shot with my cell phone right before the party.

   Each double-sided strip is 1/2"x 6", and is hot glued to the tree. I started gluing along the bottom and worked my way to the top. The exception to this was the smallest tree. The top row's strips are only 1/2"x 3" because of the spacing.

   Next I embellished each tree. To do this I used Thin Cuts-Stars set from CTMH, and the Stars thin waver dies from Heidi Swapp to make the toppers for each tree. I die-cut these from CTMH gold glitter paper using a mirror image technique. To do this technique first die-cut with the glitter paper facing up. To get the "mirror image", die-cut the same image, but with the glitter paper facing down. This way you can glue the two pieces back-to-back without any white backing showing (this works best with non-symmetrical images such as these stars). 

   I then embellished around the tree using the different sized circles from the Gold Glitter Fundamental stickers that CTMH had in the last Annual Inspirations Idea Book. I love these sticker sheets, and bought a ton of extras so I had plenty to spare while decorating these trees! You can never have enough gold glitter!

   The next project I did was a paper mache word made from marquee letters. I purchased these letters from Hobby Lobby as well, spray painted them white, and decorated them with the same paper from DCWV, and some silver glitter snowflakes! This was a super cute and easy project to whip up, but still looks amazing and elegant as a display!


   I traced each letter by hand onto the paper I wanted to use. I cut these out, ink distressed the edges (in this case with CTMH Desert Sand ink), and glued the paper to the letter. I then used the Thin Cuts-Snowflakes set from CTMH to cut out the two different sized snowflakes to decorate each letter. This die set sold out early (which I know was a bummer for most people), but wowzers! LOVE LOVE LOVE how this simple added die-cut made the whole project stand out! 

   So there you have it! What did you work on in December? Have you started any projects in the New Year? I would love to hear what you're working on! I hope you get time to get crafty this week, and until next time:

Here's to life, love, and creativity!
   

Monday, December 19, 2016

Make It Monday

   Welcome back to Make It Monday! Have you been getting crafty for the holidays this month? Are you crafting for you or for others? I typically do more crafting for others this time of year, but I am hoping to squeeze in some time for my projects soon!

   Today I want to share another layout with you, but this one is for Christmas pictures! I used the Workshops Your Way: City Sidewalks Kit to complete this layout. However, I modified the original layout and sketch to make it my own. This is layout #2 from the WYW kit:

   Now here is my take on this sketch:


   I took the original sketch and rotated it outward (the bottom of the sketch now became the sides). I don't typically use a lot of 2x2 or 3x3 sized pictures so I also modified the picture sizes on my layout to use 4x6 and 3x4 pictures instead!

   Instead of the stripe paper I used the darker trees side, but kept all the other papers and colors the same. I moved the title to the bottom to accommodate my pictures better, too, and dovetailed all the pieces under the title piece. I added the glitter die-cut pieces from the City Sidewalks Complements pack, but still thought it needed something. So I decided to add some stamping! I used the Cozy Christmas stamp and Thin Cut Bundle to die-cut the trees and stamp them for my pages. I used Willow and Lagoon inks for the trees, Chocolate ink for the bases, and Cranberry ink for the stars. Then I layered and adhered them to my pages. I think they added the perfect touch, and were super easy to do!

   What do you think of my modified layout? What's your favorite way to modify sketches given to you in the Workshop kits? Let me know if you have any questions about this project or about the products used! Remember, this WYW kit and coordinating embellishments and stamp sets retire at the end of this month! So make sure and gets yours before it's too late! I hope you have a very Merry Christmas, and until next time:

Here's to life, love, and creativity!

Monday, December 12, 2016

Make It Monday!

   Welcome back to Make It Monday! Sorry I have been MIA the last month with my blog posts. It has been very busy with traveling, craft fairs, and the holidays! I am slowly getting caught up, but wanted to share some holiday and winter projects with you before the holidays sneak by us!

   Today I want to share a layout I made using the Oh Deer paper pack by Close to My Heart. This layout was inspired by a Scrapbook Generations sketch that I made into a 2 page layout and modified! Here's what I came up with:


   I also offered the first page of this layout as a make-n-take at my Fall Retreat this past September/October! I used 1 full page of the branches and acorns paper, but cut it down to span the two pages. I then edged that paper with the matching zip strip from that sheet of paper. I used Sea Glass and Cocoa cardstock to mat my photos on the left-hand side and to edge my photos on top and bottom as seen on the right-hand page.

   All the pictures used were 4x6 so I didn't have to cut anything down! I also used Sea Glass glitter paper and the Snowflakes Thin Cuts (now sold out) to embellish the layout. For the title I used the Winter Thin Cut and a Cricut die-cut title from the new Flower Market Cartridge by CTMH. I like how the two different fonts work together even though they are from completely different products!

   On the left-hand side I stamped the journaling lines using the Capture This stamp set and Desert Sand ink. I then stamped the pine branches from the Perfectly Pine stamp set in Bamboo ink. On a separate scrap piece of White Daisy cardstock I stamped the pine cones in Cocoa and Desert Sand inks, and fussy cut them out to layer them over the stamped pine branches. I also added the berry branches in Ruby ink behind the pine cones. This was an extra fussy cut I had from the September stamp-of-the-month (now retired).

   I really like how quick and easy this layout came together, and the pictures of me and my niece from a couple years ago fit perfectly with the colors! If you have any questions about this layout or the products used, please let me know! The Oh Deer paper, Thin Cuts, and Perfectly Pine stamp set will all be retiring at the end of this month! So make sure and get yours before they sell out or before they retire! Until next time,

Here's to life, love, and creativity!

Wednesday, November 9, 2016

Get Organized this Fall!

   The election is finally over. I'm not going to get into politics on here because this is not the platform to do so, but I will say that I am glad to not have the ads and phone calls any more this month. So back to the fun things at hand....papercrafting! Woohoo!

   Papercrafting is very therapeutic for me, but so is organizing! I mean who doesn't like to have a new system to store and display your fun supplies???

   Today I want to share with you another shot blog series I am going to do this Fall/Winter called "Get Organized". Today I have a video I did on how I am storing some products that I find difficult to store and/or take with me on crops and retreats. I think you're going to love this! Check it out on my YouTube channel or watch the video below:


   What do you think? Pretty fun, right? I love this Sea Glass Album, and what better way to store these tools than in a pretty album! Let me know your thoughts, and until next time:

Here's to life, love, and creativity!

Friday, October 21, 2016

New Products!!!

   Happy Friday! It's an exciting week for CTMH because quite a few new products were released this week! I am so excited to be able to tell you about all these! So without further ado, here's the low down:

1.) 2017 Planner

      Woohoo! If you recall from an email this summer, I mentioned that mid-October we would be seeing the 2017 Planner from CTMH. Well it's here, and it's amazing! These planner pages will fit in the old Black and Gold albums from last year or in the new Black and White stripe or Sea Glass albums!


      The planner has 12 monthly tabs each with a different design on it for you to color (if you choose). Then each week has a page spread with each day getting its own horizontal box to fill in or journal on. I love this type of layout because I can use Bullet Journaling to record my family memories, notes I want to remember, or ideas I had. I will be posting a video of my planner once I receive it in the mail next week!

      Want to get your 2017 planner?? There a few ways you can order. There are 2 planner bundles to choose from or you can get just the planner pages by themself. The planner bundles include
either the Everyday Life Sea Glass album or the Everyday Life stripes album, as well as
the planner pages. These planner pages come with monthly calendars (Sunday through
Saturday), weekly calendars (Monday through Sunday), 12 pages for notes and
journaling, a clear pencil bag, and three gold paperclips.

     
      Order yours today because these planners are while supplies last only, and won't stick around for long! Let me know if I can help you get your planner today!


2.) New Thin Cuts

      Also released this week are 4 new Thin Cut sets that coordinate with stamps from the Annual Inspirations Idea Book! These are also while supplies last for the rest of the duration of the Annual Idea Book, and are:

CC1155—Swirly Seashells ($18.95; coordinates with C1664 Swirly Seashells)
CC1156—Sweet Birthday ($9.95; coordinates with B1532 Sweet Birthday)
CC1157—Wreath ($10.95; coordinates with A1193 Wreath)
CC1158—School Kids ($15.95 USD; coordinates with D1706 School Kids)


3.) New Tombow Tape Runner

      Starting this week, CTMH has decided to add Tombow's latest tape runner to the CTMH adhesive line! This new tape runner has a better design,  permanent adhesive, and the ability to place tape in the smallest corners for more even coverage. You can get the runner and refill now on my Online Shop!


4.) New Hostess Rewards Items

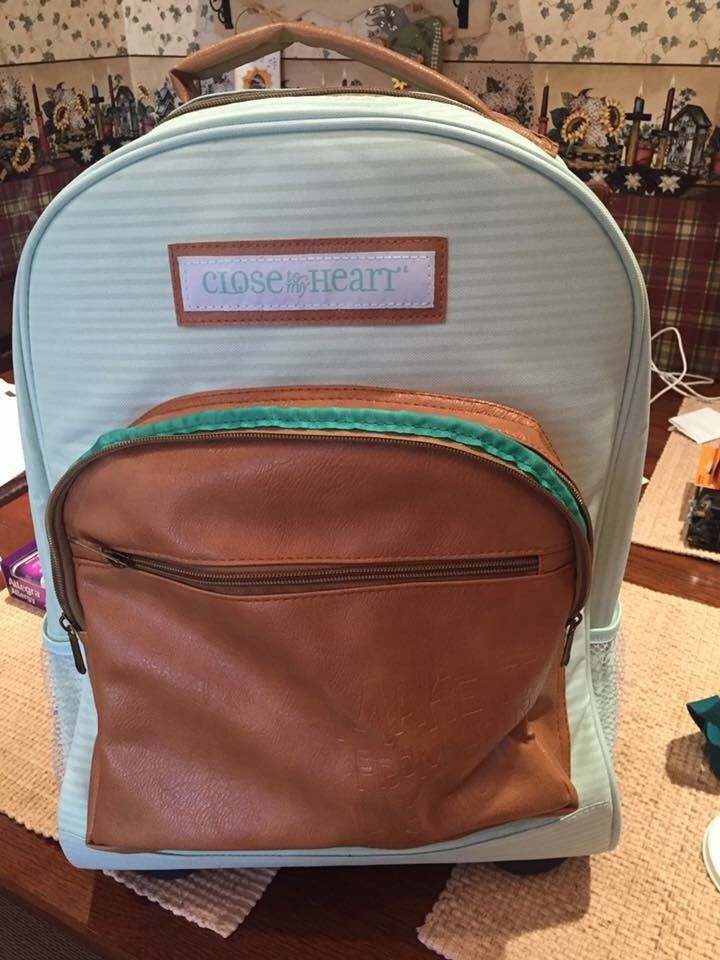
      Starting November 1st, Hostesses will have new options to purchase with their qualifying 50% off item! You will be able to get exclusive CTMH gear that has only been available to consultants this year! You can get the Whimsy craft apron, the 2015 Convention messenger bag, or the 2016 Rolling Bag!


          So what are you waiting for?? Host a workshop with me today to earn these items for yourself!  

Availability Update:

      Workspace Wonder items will start to become available by the end of the month, but in limited quantities. If you have your heart set on any of these items, make sure and place your order immediately to ensure availability. I will keep you all updated as soon as I find out that this awesome new organizing system is out!


      Shimmer Brushes have been out of stock for a couple weeks now. They are a hot commodity this fall, and new shipments have sold out fast when available. The next big shipment should be here by the end of the month.


    That's it! I know there was a lot of info, but you can contact me with any questions you might have or if you need help placing an order! Happy Shopping this weekend, and until next time:

Here's to life, love, and creativity!