Background

Showing posts with label Embellishments. Show all posts

Monday, June 26, 2017

Make It Monday!

   I fly out to Salt Lake City tomorrow afternoon for the CTMH Convention! I am SOOO very excited for this! We get to tour the home office this year, I am participating in the Layout Contest, and we get to see the brand new Annual Inspirations Idea Book and all the new products early! Eeeeek! This is my absolute favorite time of year! 

   Before I go, though, I want to close out the month with a bang and show you the last layout using the No Worries Workshop Your Way kit! I really really loved playing with this kit, and have a TON of papers left over still after creating 4 layouts and a few cards! I will definitely be using up all my scraps from this collection and making more artwork soon!

   This layout was inspired by a sketch in the Magic How-to Book (currently on the retiring list...so get a copy for yourself NOW) pages 54-55! 


   I used the Palm tree paper (front and back) and the whitewashed woodgrain paper to create this layout. I then embellished it was die-cuts and stickers from the matching Complements pack. The very thin stripe pieces on both pages is actually part of the negative print leftover on the sticker carrier sheet! I just fussy cut it, cut them down, and used them as banners to complete the look.


   This section of the layout is my favorite, though! The date stamp and this "Relax!" sentiment came from the No Worries-Scrapbooking stamp set in the Seasonal Expressions II Idea Book. I stamped the date stamp using Slate ink, but for the Relax stamp I used a fun blending technique so that it would match some of the other Complements from this collection (see below).

   I used Glacier, Sweet Leaf, and Cashmere inks to create this effect on the stamp with Sponge Daubers! I added the Cashmere first on just the top. Then I added the Glacier along the bottom, and last I blended them using Sweet Leaf in the middle. I love how this turned out, and it matches the stickers pretty good I think! 
   I then added some doodle lines around the stamped area to give it a set apart look from the page, and TA-DA.....done! This layout didn't take long at all to complete, and I love the simple yet elegant look of it!

   I hope you get to try this stamping technique for yourself on your next project! I would love to see how it turns out for you! Enjoy the rest of your week, and I'll be excited to share all the new stuff I learned at Convetion once I'm back! Until next time:

Here's to life, love, and creativity!

Monday, June 19, 2017

Make It Monday!

   Welcome back to another Make It Monday project! Today I want to show you my take on Layout #3 from the No Worries Workshop Your Way kit!


   I modified the cutting guides for this layout a little bit so that I could stretch my collection a little further. I used White Daisy cardstock for the bases and wallpapered them using the patterned papers cut down to size. Like the other two layouts, I used foam tape behind some of my die-cuts and stickers from the complements pack to give added dimension.


   I also added a Pocket Plus Design #1 (Horizontal 4x6 photos) Page Protector as suggested as an optional add-on to this layout! This picture shows the Pocket Plus over the right page.


   This picture shows the Pocket Plus over the left page. I love using these to add extra photos to my layout without having to make another two page spread! It's a great way to complete pages faster and easier. Plus it saves you time, too, and we all could use more of that, right??

   I have one more layout to show you this month as part of this featured paper pack! I think you're going to love it! Check back next week to see me wrap up this collection, and until next time:

Here's to life, love, and creativity!

Monday, June 12, 2017

Make It Monday!

   Happy Monday to you! I kicked off my June with a ton of graduation parties already, but now I am down in Janesville, WI for a workshop that I am teaching tonight! I can't wait to show off these fun cards we are making using the No Worries paper pack!

   I also wanted to share a quick project with you all today! It's my second layout from the No Worries Workshop Your Way kit, and I LOVE it! These papers just make me swoon, and these pictures do not do them justice!


   I didn't modify this one at all! I love the layout as is and stuck to the cutting guides as suggested, too! For the embellishments I added foam tape behind the heart circle sticker on the upper left page, and the one on the lower right page. I also added some foam tape behind the "Together" circle sticker as well to make it pop more. I use a baby powder applicator to take the sticky off the stickers before adding foam tape, but corn starch also works, too!

   Thanks for stopping in and checking out another fun project this month! I hope you can make time to get crafty soon, and maybe even play with this kit! Until next time:

Here's to life, love, and creativity!

Thursday, June 8, 2017

Throwback Thursday!

   Last month I didn't get a chance to post as many projects as I wanted to share with you all! So today I am going to throw it back to show you an awesome layout I scraplifted from the very talented Karen Pederson using last month's exclusive paper pack: Live Beautifully!

   If you remember, last month was National Scrapbooking Month, and CTMH really outdid themselves with the release of this exclusive collection! Karen Pederson was very generous to share her workshop with all of the CTMH consultants, so I took her workshop and decided to make it my own using my favorite papers from this kit!


   The colors in my photo do not do this layout justice! It's so beautiful with the Seaglass tones, gold foil accents, and black glitter hearts. I love how this turned out!

   Some of the hearts came from the You & Me Complements (which is now sold out), but the other couple I punched out of Black Glitter paper with a couple heart punches I had on hand! I also decided to wait on titling this layout until I pick out my pictures, but the little section between the hearts on the right page is reserved for titling/journaling.

   Did you get your hands on this paper pack last month?? How about the Cut Above Kit?? I really had fun scrapping some photos from the parents' wedding 11 years ago using those layouts!

   Well I hope you're having a great week, and I hope you enjoyed checking out some more artwork from me! Have a great weekend, and until next time:

Here's to life, love, and creativity!

Monday, June 5, 2017

Make It Monday!

   It's June already and I can hardly believe it! Summer is starting to peek at us and CTMH Convention is only 3 weeks away! Woohoo! I have a ton to do before then, but I wanted to share a fun layout with you today featuring this month's paper pack, No Worries!


   I followed the instructions for the first layout in the No Worries Workshop Your Way, but modified the cutting guides a little bit. I used White Daisy cardstock as my bases and only cut 1 palm tree paper to make the "middles". Everything else is the same! I also added foam tape behind the whitewashed starfish and the "Better" circle sticker. I like the different dimensions and added details that this gives to a finished layout!

   I love this collection so much and cannot wait to put some fun beach photos on it! Is this collection speaking summer fun to you? What photos are you hoping to scrap using this kit? Let me know! I would love to hear from you! Until next time:

Here's to life, love, and creativity!

Monday, May 8, 2017

Make It Monday!!

   I'm sorry it has been so long since I have updated or posted. Time really has flown by already this year, and I found it hard to keep up with my blog with everything else my family had going on. I am hoping I can get back to posting regularly for you, though! I miss showing you all the fun things I have going on!

   Today I want to bring back my "Make It Monday" posts for you to show off some artwork and fun things that I have been creating lately! Today's artwork is from the new Seasonal Expressions II Idea Book! This book just went live May 1st. So you can see it online now or you can contact me to get a copy for yourself! 

   I love the collections in this idea book, and I think you'll love them too after seeing all the cute ways you can use them! The first collection I am featuring this month is called "Little Dreamer", and it is perfect for birthday celebrations, little girl pages, and summer fun projects!


   I started using this collection for my niece's 2nd birthday party pictures. The colors in this collection matched her outfit perfectly, and I thought it was the perfect bright and cheery patterns to show off her cute little personality in these photos!

   I stamped the banners portion on top using the "Way to Go" stamp set in Glacier, Thistle, Canary, and Whisper inks. The journaling card came from the retired "Beautiful You" Picture My Life set, and I used a mix of embellishments to finalize the look: White & Gold ribbon from the Little Dreamer collection, the Little Dreamer Complements, My Girl Complements, and the Gold foil dots came from the alphabet sticker sheet out of the retired January campaign: Welcome Home Wreath. 

   All of my pictures are 4x6 photos so I didn't have to do any trimming or re-sizing. The purple strip on top of my photos is the zip strip from the paper I used! I love that CTMH gives us extra border pieces to use with each paper in the collection! 

   This is the layout we are making at my in-home workshops this month! If you want to host one to make this layout yourself, contact me today! I would love to come show off the new products for you and your crafty friends! 

   I hope you have a great week! Enjoy the sunshine, and I hope you are able to get some crafty time in! Until next time:

Here's to live, love, and creativity!


Monday, January 9, 2017

Make It Monday

   Good Morning, everyone! I hope you all had a great weekend, and stayed warm/safe with the crazy weather and cold temps going around the states right now.

   I have been meaning to post a couple projects I did in December, but with the holidays I never had a chance to get them posted. Well today is your lucky day to see them! So consider today a Make It Monday/Throw Back Thursday combo-type of post! hehe

   I made these two projects as prizes for my husband's work Christmas party. They were a ton of fun to make, but, also, I had to throw them together quite quickly with all the other things on my December to-do list! 

   This first project was inspired by a fellow consultant, Donna Cosgrove, and her tree project she posted on Instagram! I purchased 3 paper mache trees from Hobby Lobby, spray painted them white, and decorated them using Oh Deer papers and papers from an old DCWV Collection called Winter in the Woods.

I forgot to take decent pictures of these at home, and had to snap this shot with my cell phone right before the party.

   Each double-sided strip is 1/2"x 6", and is hot glued to the tree. I started gluing along the bottom and worked my way to the top. The exception to this was the smallest tree. The top row's strips are only 1/2"x 3" because of the spacing.

   Next I embellished each tree. To do this I used Thin Cuts-Stars set from CTMH, and the Stars thin waver dies from Heidi Swapp to make the toppers for each tree. I die-cut these from CTMH gold glitter paper using a mirror image technique. To do this technique first die-cut with the glitter paper facing up. To get the "mirror image", die-cut the same image, but with the glitter paper facing down. This way you can glue the two pieces back-to-back without any white backing showing (this works best with non-symmetrical images such as these stars). 

   I then embellished around the tree using the different sized circles from the Gold Glitter Fundamental stickers that CTMH had in the last Annual Inspirations Idea Book. I love these sticker sheets, and bought a ton of extras so I had plenty to spare while decorating these trees! You can never have enough gold glitter!

   The next project I did was a paper mache word made from marquee letters. I purchased these letters from Hobby Lobby as well, spray painted them white, and decorated them with the same paper from DCWV, and some silver glitter snowflakes! This was a super cute and easy project to whip up, but still looks amazing and elegant as a display!


   I traced each letter by hand onto the paper I wanted to use. I cut these out, ink distressed the edges (in this case with CTMH Desert Sand ink), and glued the paper to the letter. I then used the Thin Cuts-Snowflakes set from CTMH to cut out the two different sized snowflakes to decorate each letter. This die set sold out early (which I know was a bummer for most people), but wowzers! LOVE LOVE LOVE how this simple added die-cut made the whole project stand out! 

   So there you have it! What did you work on in December? Have you started any projects in the New Year? I would love to hear what you're working on! I hope you get time to get crafty this week, and until next time:

Here's to life, love, and creativity!
   

Monday, December 12, 2016

Make It Monday!

   Welcome back to Make It Monday! Sorry I have been MIA the last month with my blog posts. It has been very busy with traveling, craft fairs, and the holidays! I am slowly getting caught up, but wanted to share some holiday and winter projects with you before the holidays sneak by us!

   Today I want to share a layout I made using the Oh Deer paper pack by Close to My Heart. This layout was inspired by a Scrapbook Generations sketch that I made into a 2 page layout and modified! Here's what I came up with:


   I also offered the first page of this layout as a make-n-take at my Fall Retreat this past September/October! I used 1 full page of the branches and acorns paper, but cut it down to span the two pages. I then edged that paper with the matching zip strip from that sheet of paper. I used Sea Glass and Cocoa cardstock to mat my photos on the left-hand side and to edge my photos on top and bottom as seen on the right-hand page.

   All the pictures used were 4x6 so I didn't have to cut anything down! I also used Sea Glass glitter paper and the Snowflakes Thin Cuts (now sold out) to embellish the layout. For the title I used the Winter Thin Cut and a Cricut die-cut title from the new Flower Market Cartridge by CTMH. I like how the two different fonts work together even though they are from completely different products!

   On the left-hand side I stamped the journaling lines using the Capture This stamp set and Desert Sand ink. I then stamped the pine branches from the Perfectly Pine stamp set in Bamboo ink. On a separate scrap piece of White Daisy cardstock I stamped the pine cones in Cocoa and Desert Sand inks, and fussy cut them out to layer them over the stamped pine branches. I also added the berry branches in Ruby ink behind the pine cones. This was an extra fussy cut I had from the September stamp-of-the-month (now retired).

   I really like how quick and easy this layout came together, and the pictures of me and my niece from a couple years ago fit perfectly with the colors! If you have any questions about this layout or the products used, please let me know! The Oh Deer paper, Thin Cuts, and Perfectly Pine stamp set will all be retiring at the end of this month! So make sure and get yours before they sell out or before they retire! Until next time,

Here's to life, love, and creativity!

Sunday, June 28, 2015

Artwork Spotlight: Blossom Layout #3

   It's the last weekend of June and I have one more Blossom layout to share with you today! Today's layout is a one-page spread that was also a promotional kit for anyone that hosted a CTMH party with me last month! The hosts received this kit and all the pre-cut supplies needed to put this fun layout together when I gave them their hostess gift bags!


   I used a sketch from "Scrapbook Generations: One-page Sketches" book Volume 2. I love these inspirational sketches! They always get my creative juices flowing so much faster when I start creating (especially if I haven't created in awhile).

   For this page I used Kraft cardstock as my base. Then I cut a piece of Blossom paper for the main strips in the background. I even used the super cute, striped zip-strip from the top of my paper! I used my Cricut Explore to weld and cut the notebook edge border from the Artbooking cartridge out of Sweet Leaf cardstock. I also cut a piece of Sunset cardstock as the other background strip.

   I edge distressed my larger background strips for added texture, and then used up more of my Blossom complements to embellish the rest of the page. The word flags come from the Carnival and Boardwalk washi tape sets, but I backed them with White Daisy cardstock to make them pop a little more off the page.

   I also tried a fancy stamping technique for this page. I did a type of reverse shadow stamping to make my images pop against the Kraft background. The title came from the "Documenting Moments" stamp set out of the Seasonal Expressions II Idea Book.

   I stamped it in Lagoon pigment ink first, and set it aside to dry. Then I stamped over top of the image with White Daisy pigment ink. I off-set this second stamp to allow the Lagoon to "peek" out as a shadow, and I love how it turned out! It's so easy to do techniques like this with clear, acrylic stamps!


   I used the same reverse shadow technique with the arrow stamp in the bottom left corner. This image is from the "One-Way Borders" stamp set in the Annual Inspirations Idea Book. I stamped one direction in Sweet Leaf pigment ink, and the other direction in Sunset pigment ink. I let those dry, and went back over them with White Daisy pigment ink. I love how the color shows through, and the images stand alone!

   Many of the products that I used to complete this layout are retiring at the end of the summer! You do not want to miss out on your favorite paper collections, stamps, and embellishments! So make sure and shop the retiring products selection on my Online Shopping site! Many items are going fast, and are not guaranteed to be in stock through August! Shop early and shop fast to get the items you want! 

   It's also the final days to order the Blossom pack, or the Blossom WOTG, with the Blossom Complements from me this month! When you do you will automatically receive instructions to complete the exclusive layout you see below for FREE!! What are you waiting for?? Get your free layout instructions today and place your order!


   Have a great start to your week, everyone, and I can't wait to share more projects with you in July when I'll be featuring the Brushed paper collection! Until next time:

Here's to life, love, and creativity!

Sunday, June 21, 2015

Artwork Spotlight: Blossom Layout

   Welcome to another artwork post for June! It's Sunday and I have another Blossom layout to share with you all today! 

   This month I am featuring the Blossom paper pack in my projects, workshops, and classes. So today I want to share with you a layout that I created using the Blossom paper pack, Blossom Complements, Carnival Washi tape, and the Adventure Fundamentals paper pack. 


   I used a sketch from the "Make It From Your Heart Vol 2" Pattern 5 to come up with this layout, and I just love it! Once I decide what pictures to use on this layout I will add a title above the photo on the left side, and journaling in the blue box on the right side. The faux stitching around the edges was made using a gray alcohol marker, and the circle embellishments are cork circles from the Pathfinding assortment.

   This picture doesn't do the colors justice, but I mounted some of the photos on slate cardstock, and the photo on the left is also mounted on Honey chevron fundamentals paper! 

   Don't forget, when you purchase the Blossom pack, or the Blossom WOTG, with the Blossom Complements from me this month, you will automatically receive instructions to complete the exclusive layout you see below for FREE!! What are you waiting for?? Get your free layout instructions today and place your order!


   I hope you're having a great weekend and enjoyed seeing another Blossom layout this week! Until next time:

Here's to life, love, and creativity!

Thursday, June 4, 2015

Window Frame Project

   I am officially 31 weeks pregnant today! I can't believe how fast this pregnancy is going! I feel great and have no complaints. I feel very blessed so far, and hope it lasts through labor as well!

   Today I have a very special project I want to share with all of you! Back in April I had a lady I met at last fall's craft fair contact me. She was wondering if I could help her with a graduation project that she wanted to complete for her daughter's party in June. We had talked about it briefly at the craft fair last fall, and she was following up in hopes that I could be hired to design this project for her!

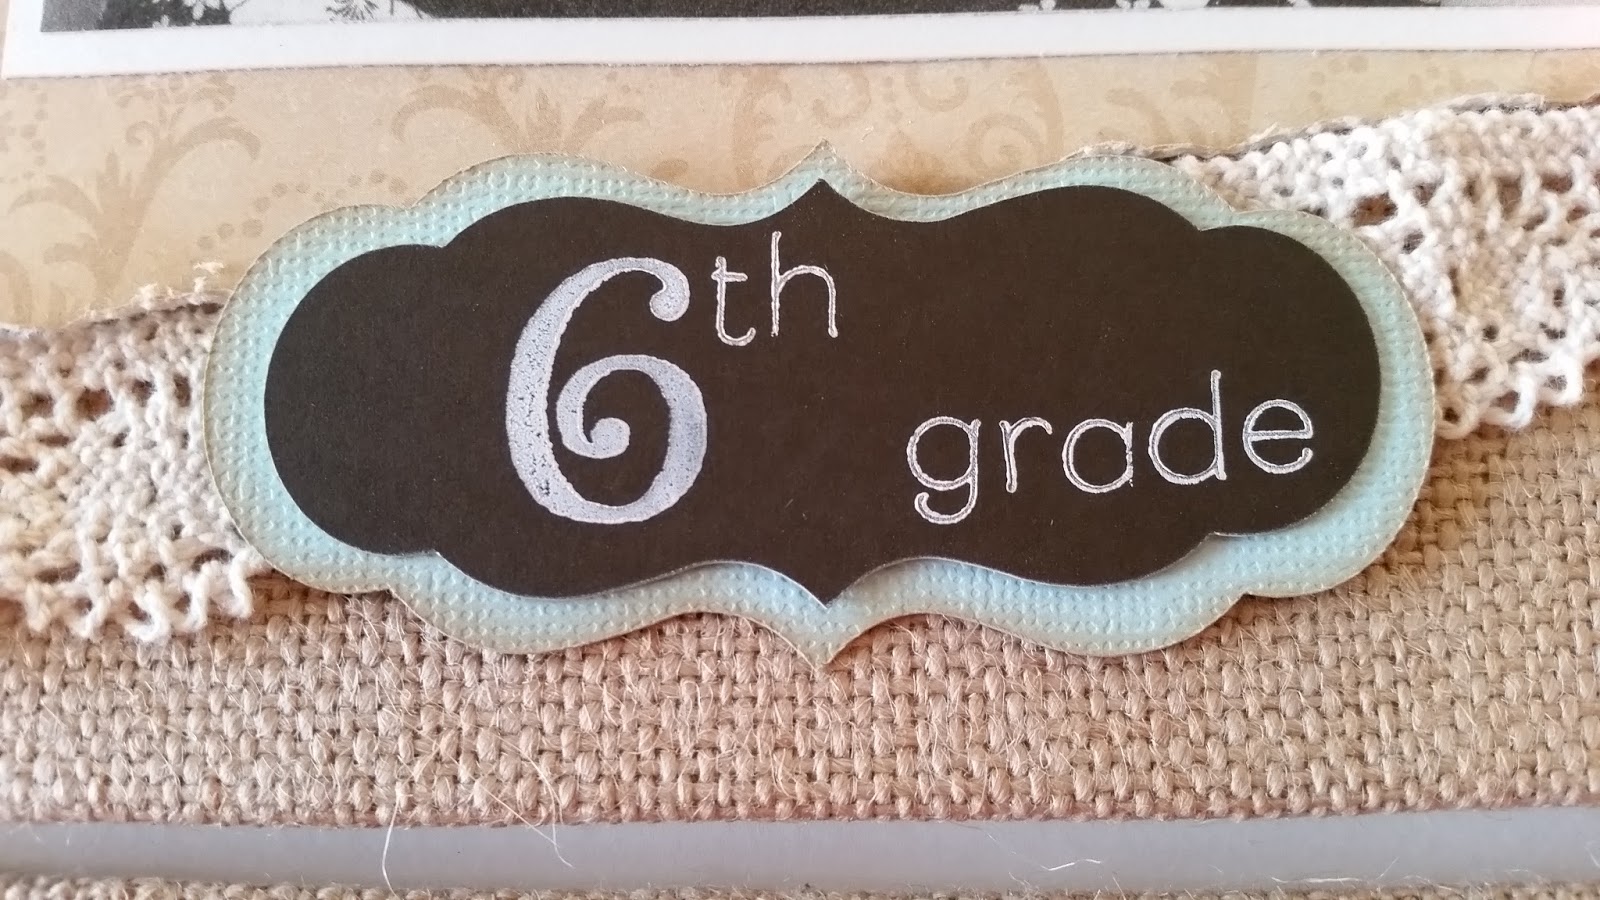
   I was flattered! I love doing projects for people, and this one was right up my alley! She had 2 windows with 9 panes in each. She was hoping that I could design a project so that she could showcase her daughter's photos from birth to 11th grade in each pane! She wanted a shabby chic type of feel, and she wanted to use a coral color and tiffany blue color as the many accents. She also had these burlap 8x10 boards that she was hoping to use on the back of each pane for each picture to sit on.

   So I met with her at the end of April before we left for New Orleans, and then started working on the windows a week after we got back! I finished up the final details Memorial Day weekend, and her other daughter picked them up from me last week!

   It was a little challenging trying to figure out the best way to attach the burlap boards without showing a lot of glue or adhesive from the front side, but I think I got it figured out after trying a couple things! 

   I am really pleased with how they turned out, and I wanted to share pictures* of them with all of you so you can see some of the stuff I have been working on lately!  I'm sorry if the pictures are a little blurry. It is hard to get a good picture against glass!

First Window Pane Completed
Close-up of the Name Banner I put in the upper corner of the frame. These were chipboard letters that I painted in white acrylic paint and then coated with Avery Elle Sea Glass pigment ink. To make sure the ink didn't rub off, I then coated each letter in a Matte finish Mod Podge.
Here is the first row of pictures. I used My Mind's Eye, Heidi Swapp, and Core-dinations papers for the whole project. I cut the branches and paper flowers on the Cricut using the Art Philosophy and Artiste cartridges. I then embellished the photos with brads, pearl gems, mini clothespins, Base & Bling charms, lace ribbon, and a border punch. 
Here is the second row of pictures. I tried to keep the theme similar throughout both windows, but accented and laid each pane out different for contrast! These pictures were embellished with more of the same die-cuts, pearl gems, paper doilies, hemp twine, Base & Bling charms, and some hand-stitching over vellum!
Here is the third and final row on the first window. I embellished these pictures with paper butterflies, paper flowers, pearl flourishes, lace ribbon, and a stick pin.
Here's the 2nd window completed!
Here's the burlap banner on the second window.
Here's the first row of the window at a closer view. I embellished these with similar items as the first window frame! I have pearl gems, a die-cut doily, hand-stitching, Base & Bling charms, hemp cord, and the same papers from the same lines as before!
Here is the second row of pictures. You can see that I embellished the panes very similarly between the two windows. It made it easier to tie everything together!
Here is the last row of pictures! I love the feminine feel of the whole project, and the vintage look with everything put together.
Here's a close up picture of the paper flower detail that I put on both bottom corners of the windows. I cut the rolled flowers from CTMH's Art Philosophy and Artiste cartridges, distressed the edges in Cashmere ink, rolled them using my quilling tool, and glued them together with Liquid gold (I mean glass)! Then I added some distressed branches, and some pearl finishes, and that was it! These were super fun to make!
The "titles" under each picture were stamped with White Daisy ink on chalkboard paper. Chalkboard paper isn't very porous, though, and the ink takes a long time to dry. So to make it smudge proof I embossed it with clear embossing powder and a heat gun. The two font stamp sets I used to create these titles were the "Glamour Lowercase Alphabet" and the "Artfully Sent Alphabet" both from CTMH!

   I hope you enjoyed looking at my finished project! I had a blast making it, and can't wait to hear how it's received at her graduation party in a couple weeks! If you have any questions on products used or techniques, please let me know! Otherwise, have a great rest of your week, and until next time:

Here's to life, love, and creativity!

*I was given permission by the mom to post these pictures to my social media sites.

Tuesday, May 5, 2015

Tuesday Tidbit: Making Ephemera


   Happy Cinco de Mayo to you all! I hope you are enjoying the start of this beautiful Spring month! The weather has been gorgeous up here in Minnesota, but we could use some rain really soon!

   Anyone get a start on their projects this past weekend to celebrate National Scrapbooking Month? I was traveling back from New Orleans this weekend so I didn't get a chance to play yet, but hopefully later today!

   I have a fun Tuesday Tidbit for you today! Today I want to share with you an easy and effective way to use stickers as embellishments on your layouts. I love all the super cute stickers that are on the market! Especially the sticker complements that CTMH has with each of their paper packs. Unfortunately, though, once you stick one down they are difficult to move, change, or layer afterward!

   I want to share with you something that I do when I want to use up some of my complementing stickers! I turn all my stickers into ephemera to make it easier to position them on my project and make it easier to decide how to use them as embellishments! Here's how I make sticker ephemera:

1.) Gather Supplies: Sticker sheets, baby powder, splat mat, and baby wipes!

All the supplies you need for this quick tip!

2.) Pour a small amount of baby powder on your splat mat, and use your finger to apply the baby powder to the back of your stickers.

It can be messy, but it's so fast and easy to do!

3.) Make sure the back of the sticker is completely covered in baby powder so that the sticker loses its "stick" completely.

4.) Do this to all the stickers in the complements set. Then store them in a baggie or their original packaging until you're ready to use them!

All of these Blossom stickers have baby powder on the back. They still have a little tack to them, but just enough to keep them stored on these sheets until I'm ready to use them!

5.) When you're ready to add the ephemera to your project, layer them and place them where you want them. Then add adhesive (I use the CTMH glue pen) or foam tape to the back of the ephemera piece and adhere!

   I do this to all my complement stickers when I receive them with my paper packs! It makes it much easier to project plan and embellish without the commitment of leaving them super sticky! Plus it doesn't take long, and cleans up super easy, too!

Here's my stack of Wanderful ephemera made after unsticking all the stickers from the sheets! It's all ready for layering and embellishing without the hassle of a permanent stick!

   With really sticky stickers, sometimes they will still have a little "stick" to them even after the baby powder is applied. I put these back on the sticker sheets to keep them in place and prevent them from sticking to each other later. You could also use wax paper to help the ephemera from sticking to each other, too!

    That's it! I hope you enjoyed today's Tuesday Tidbit and found it helpful for embellishing your next project! If you have any questions, please let me know! Otherwise, have a great day, and until next time:

Here's to life, love, and creativity!

Tuesday, March 31, 2015

Tuesday Tidbit: Spring Cleaning Part III

   Welcome back to the third part of my Spring Cleaning series!! How did your last week go? Were you able to get started on your "big task" from your to-do list? I hope you're enjoying this new series on getting organized! I really am having fun sharing with all of you!


   I'll be honest....I didn't get to work on my big task this week! I was wrapping up our taxes, finalizing plans for our basement finishing project, and working on upcoming workshops and planning! So I really didn't get a chance to focus on my plan yet. Hopefully later this week, though!

   There's no new challenge for this week, but I do want you to keep working on implementing your organization plan and tackling your big task! I know these things take time, and a week usually doesn't cut it! So keep working on it, and get motivated with the nicer weather that we've been having! 

Organizing Supplies Tips & Tricks:


   This week I want to share with you how I organize just a few of my embellishments. Especially the ones that I have a lot of like washi tape, ribbon, and stickers/accent sheets!


   I am the type of crafter where if I don't have it handy or highly accessible, then I'm not going to use it. This was a problem for me because I have a lot of embellishments, and I hardly was using any of them before my office remodel! Either I had to dig them out of storage or I had to thumb through boxes and unorganized bins to find what could work on my project. Neither of these things worked for me when I wanted to finish something quickly.

   First thing I did was look at ideas on Pinterest and on popular crafting blogs! I saw a ton of ideas for storing embellishments, but really it came down to "what am I going to really use?" and "will it work in the long haul?".

   For washi tape and ribbon, I loved the idea of using pants hangers to store my tape! I could hang these in the closet when not in use, and I could hang them from my cabinets when I wanted to find the right color or pattern for my project.


   I have a TON of washi tape, though, and knew I would need a lot of hangers. So I also decided to buy the We R Memory Keepers Washi Tape stackable dispenser system! I bought the base which came with 20 rolls of tape, and then I bought an extender and top tier. This I can leave on my desk or work space, and I fill it with the washi tape I reach for the most!

We R Memory Keepers Washi Tape Dispenser base with 20 rolls of tape
Stackable tier and post to add to the base system
    I purchased these online on a website called Blitsy! They have really great sales, and sometimes you can catch this set up to 50% off! The sales change week to week, though, so you really have to watch for it!


   For my stickers and accent sheets, I needed a completely new system! I originally had my stickers and sheets filed in 12x12 accordion folders. These worked for a long time for me! I originally bought them at Big Lots when I first started getting into scrapbooking again (back in 2006-2007). However, I quickly out grew these and would have to dig through them to find what I needed. The small sheets were always on the bottom, and I just stopped getting them out. I had too much for these folders, and I wasn't using what I had to help use up my stash!

A couple of my small Accordion File Folders that I used for paper and embellishment sheets
Inside of one of the folder to show how many sections there are to this nice organizer!
  
   If anyone is interested in these accordion folders, I have my extras, which are in great shape, for sale! Only $5 for the large ones, and $3 for the smaller onesContact me and let me know if you want them! Otherwise, they will be available at my big craft sale coming up in about a month!

   I scored another online deal a while back and got an extra large Clip It Up organizer! This base unit is 18" wide to fit 12x12 sheets (if I needed...which I did)! It came with some clips and some plastic tag labels to section off items!

   I had it stored away in the box until we started our office project. At that time, Archivers was going out of business up here, so I went to the store specifically looking for an upper Clip It Up tier and more clips! I found exactly what I needed, and was able to get it 30% off with the store closing sale.


   Now the crummy part about this system is that the "Simply Renee" brand has gone out of business as well. You can sometimes find the stands on sale on ebay or other sites, but they're usually more expensive. I had a couple friends score some deals from other crafters on Craigslist. So you could always start there if you want something similar.

   I also know that Michael's has a similar, smaller system that they sell with their organizer systems. I think they work okay, but definitely are more flimsy than the Clip It Up brand and cannot fit 12x12 sheets on the base unit.


   I have not added labels to my plastic tags yet, but all my embellishments are sectioned off by theme. I have Christmas, Fall/Halloween, Baby/Kids, and then by popular brands (Heidi Swapp, Fancy Pants Designs, etc). This makes it so much easier for me to coordinate my products and find exactly what will work on my project!

   I needed more clips, though, because I had so much that I wanted to hang. I ended up using the S-hooks from an IKEA curtain clip pack. I think there were 50 hooks and 50 clips in the pack, and the hooks worked perfectly because they are flat and I can fit more on the Clip It Up that way!

   Lastly, my CTMH embellishments! These I keep separate like my other CTMH stuff so that I can coordinate easier, and pull what I need for workshops a lot faster! For my CTMH embellishments, I use the medium organizer from CTMH! This awesome tote can hold a TON of stuff, and I love mine! It's easy to take to crops, move from work space to work space, and I have no problems finding what I need in here!

Medium Organizer with dividers
How the inside of my embellishment organizer looks for CTMH stuff! I have shimmer trim, ribbon, washi, My Crush Assortments, and bling all in its own compartments!

   Another great system by CTMH is the small organizer with the craft box foam insert and craft boxes! These handy boxes store a lot of embellishments as well, and you can see what you have a little easier! I haven't tried this system yet because what I'm using still works for me, but I know a lot of other people that like the small organizer better!

Photo courtesy of Fancy Melissa
   Hopefully this gives you some great ideas to start organizing your embellishments! If you have any questions or need help getting your hands on some CTMH organizers, please let me know! I would love to help you get organized this Spring!

   Keep working hard on your organization goal this week, and until next time:

Here's to life, love, and creativity!

Sunday, March 15, 2015

Don't Miss Out!!!

   I have loved playing with all the awesome goodies in the Seasonal Expressions I Idea Book! I found some new favorites, some classic must haves, and made some fun, new, and fresh artwork! However, there's only a couple more weeks to order some of the amazing supplies from this Idea Book before they're gone forever!

   Here are a few items that you are going to want to get your hands on before the book is retired at the end of the month:

Heartstrings Collection:


   This whole Heartstrings collection will be retired at the end of the month. This includes the paper pack, Complements, Accessories, and Workshop-on-the-Go: Cardmaking Kit!!! I love this paper pack, and have had a blast playing with it!


 Hopscotch Collection:


   The whole Hopscotch Collection will also retire at the end of the month! This is such a great Spring pack with lots of fun colors and designs to help ring in the Spring season! Don't miss out on getting the paper pack, Complements, Accessories, and Workshop-on-the-Go: Scrapbooking Kit for yourself!


Other Fun Items Retiring at the end of the Month:


Puffies Embellishments


Clothespins


Cut Above Kits


Operation Smile stamp set:


   The last major product retiring at the end of the month is the exclusive Operation Smile stamp set: You're the Bomb!!! I love this stamp set! It's full of fun images, great phrases, and versatility! You're going to want this stamp in your stash!

   Plus when you purchase this stamp set for $13.95 retail, CTMH automatically will donate $3 of your purchase to Operation Smile! Isn't that awesome?? I love that CTMH supports this awesome organization!


   The stamp sets in the Seasonal Expressions I are going to be available for the rest of the year, and any of them that have Cricut compatible cuts on them will be available indefinitely!

   The other products not listed here (PML, mini albums, twine, shimmer trim, etc) will be available until further notice!! So you have plenty of time to stock up on these items in the future as well!

   You can get all the retiring items and more on my Online Shopping site 24/7! Make sure and get your favorites ordered before the end of the month, though! The sooner the better since all of these items are while supplies last! Have fun shopping, and until next time:

Here's to life, love, and creativity!