Background

Showing posts with label stamping technique. Show all posts

Monday, June 26, 2017

Make It Monday!

   I fly out to Salt Lake City tomorrow afternoon for the CTMH Convention! I am SOOO very excited for this! We get to tour the home office this year, I am participating in the Layout Contest, and we get to see the brand new Annual Inspirations Idea Book and all the new products early! Eeeeek! This is my absolute favorite time of year! 

   Before I go, though, I want to close out the month with a bang and show you the last layout using the No Worries Workshop Your Way kit! I really really loved playing with this kit, and have a TON of papers left over still after creating 4 layouts and a few cards! I will definitely be using up all my scraps from this collection and making more artwork soon!

   This layout was inspired by a sketch in the Magic How-to Book (currently on the retiring list...so get a copy for yourself NOW) pages 54-55! 


   I used the Palm tree paper (front and back) and the whitewashed woodgrain paper to create this layout. I then embellished it was die-cuts and stickers from the matching Complements pack. The very thin stripe pieces on both pages is actually part of the negative print leftover on the sticker carrier sheet! I just fussy cut it, cut them down, and used them as banners to complete the look.


   This section of the layout is my favorite, though! The date stamp and this "Relax!" sentiment came from the No Worries-Scrapbooking stamp set in the Seasonal Expressions II Idea Book. I stamped the date stamp using Slate ink, but for the Relax stamp I used a fun blending technique so that it would match some of the other Complements from this collection (see below).

   I used Glacier, Sweet Leaf, and Cashmere inks to create this effect on the stamp with Sponge Daubers! I added the Cashmere first on just the top. Then I added the Glacier along the bottom, and last I blended them using Sweet Leaf in the middle. I love how this turned out, and it matches the stickers pretty good I think! 
   I then added some doodle lines around the stamped area to give it a set apart look from the page, and TA-DA.....done! This layout didn't take long at all to complete, and I love the simple yet elegant look of it!

   I hope you get to try this stamping technique for yourself on your next project! I would love to see how it turns out for you! Enjoy the rest of your week, and I'll be excited to share all the new stuff I learned at Convetion once I'm back! Until next time:

Here's to life, love, and creativity!

Monday, October 24, 2016

Make It Monday!

   Happy Monday to you! I hope you are enjoying this new blog series I started this month! I love sharing my projects with you all, and hope that you are feeling inspired to get crafty yourself!

   Today's project is a two page layout using the new Swan Lake Workshops Your Way collection from the Holiday Expressions Idea Book!


   As soon as I started playing with the Swan Lake papers, I knew I wanted to scrap these photos of the hubby and I from 2010!!! Yep...only 6 years ago...no biggie.

   For this layout, I used the main pattern paper (swans on one side and floral background on the other) as accent pieces. Then I used the zip strip from that same paper under my photos, and finally embellished the whole layout using stamped images! That's right....only stamped images on this one! I used the With You stamp set from the Holiday Expressions Idea Book, and the Capture This stamp set from the Annual Inspirations Idea Book. I also used the September stamp-of-the-month, Blessed Beyond Measure, to add a few more Fall touches as well.

   The title was stamped directly on my project using Peacock ink and the new Marker Alphabet stamp set, and I love how it turned out spanning both pages as a centered title!

   Also, the other thing I love about this layout is the fact that I have room for 11 photos on these two pages! Yep I said 11! Can you find them all? Let me give you a hint:


   FLIP FLAPS!!! I love Flip Flaps and really cannot use them enough! I really didn't want to make another layout using my leftover photos from this one out-ing. So I used a 4"x12" Flip Flap (now retired) to add extra pictures to the left side of my layout. Since I cut my pictures down to 4x4 photos on this side, I technically could have 9 photos on this 1 page! Instead of a photo, though, I decided to put some memorabilia in a photo well spot, and, if you look at the pictures, you'll notice the pumpkin stickers are the ones on our shirts from that day at the Pumpkin Patch!

   What do you think? I still need to journal on this layout about our day at the pumpkin patch, but I love how fast this came together with very little product from my Swan Lake kit!

   Let me know if you have any questions about this fun Fall layout, and hopefully you can scrap some Fall pictures for your albums this week, too! Until next time:

Here's to life, love, and creativity!

Monday, October 17, 2016

Make It Monday!

   Welcome back to Make It Monday! I hope you all are having a great start to your week! Today I want to share with you a fun fall card using the new CTMH collection, Swan Lake, from the Holiday Expressions Idea Book!


   I love the colors in this paper collection, and wanted to make a generic Fall themed card that I could use now or even closer to Thanksgiving! I used the main pattern paper from the Swan Lake collection (swans on one side and the floral background on the other), the new Black Shimmer Ribbon, and the Autumn Wishes stamp set. My card base is Kraft cardstock, and I matted my image with Glacier cardstock as well.

   To get the dimensional look on the pumpkin, I paper pieced the two middle sections from a Saffron stamped pumpkin onto a Goldrush stamped pumpkin. I also paper pieced a Chocolate stamped stem onto the Goldrush stamped pumpkin. The sentiment was stamped in Peacock ink, and both of the Colonial White cardstock pieces were ink distressed using Desert Sand.

   This is a quick and easy card to do, and looks elegant and warming at the same time! If you have any questions, please let me know! Otherwise, I hope you are able to get crafty this week and possibly make this card for yourself!

   Enjoy the rest of your week, and until next time:

Here's to life, love, and creativity!

Sunday, June 28, 2015

Artwork Spotlight: Blossom Layout #3

   It's the last weekend of June and I have one more Blossom layout to share with you today! Today's layout is a one-page spread that was also a promotional kit for anyone that hosted a CTMH party with me last month! The hosts received this kit and all the pre-cut supplies needed to put this fun layout together when I gave them their hostess gift bags!


   I used a sketch from "Scrapbook Generations: One-page Sketches" book Volume 2. I love these inspirational sketches! They always get my creative juices flowing so much faster when I start creating (especially if I haven't created in awhile).

   For this page I used Kraft cardstock as my base. Then I cut a piece of Blossom paper for the main strips in the background. I even used the super cute, striped zip-strip from the top of my paper! I used my Cricut Explore to weld and cut the notebook edge border from the Artbooking cartridge out of Sweet Leaf cardstock. I also cut a piece of Sunset cardstock as the other background strip.

   I edge distressed my larger background strips for added texture, and then used up more of my Blossom complements to embellish the rest of the page. The word flags come from the Carnival and Boardwalk washi tape sets, but I backed them with White Daisy cardstock to make them pop a little more off the page.

   I also tried a fancy stamping technique for this page. I did a type of reverse shadow stamping to make my images pop against the Kraft background. The title came from the "Documenting Moments" stamp set out of the Seasonal Expressions II Idea Book.

   I stamped it in Lagoon pigment ink first, and set it aside to dry. Then I stamped over top of the image with White Daisy pigment ink. I off-set this second stamp to allow the Lagoon to "peek" out as a shadow, and I love how it turned out! It's so easy to do techniques like this with clear, acrylic stamps!


   I used the same reverse shadow technique with the arrow stamp in the bottom left corner. This image is from the "One-Way Borders" stamp set in the Annual Inspirations Idea Book. I stamped one direction in Sweet Leaf pigment ink, and the other direction in Sunset pigment ink. I let those dry, and went back over them with White Daisy pigment ink. I love how the color shows through, and the images stand alone!

   Many of the products that I used to complete this layout are retiring at the end of the summer! You do not want to miss out on your favorite paper collections, stamps, and embellishments! So make sure and shop the retiring products selection on my Online Shopping site! Many items are going fast, and are not guaranteed to be in stock through August! Shop early and shop fast to get the items you want! 

   It's also the final days to order the Blossom pack, or the Blossom WOTG, with the Blossom Complements from me this month! When you do you will automatically receive instructions to complete the exclusive layout you see below for FREE!! What are you waiting for?? Get your free layout instructions today and place your order!


   Have a great start to your week, everyone, and I can't wait to share more projects with you in July when I'll be featuring the Brushed paper collection! Until next time:

Here's to life, love, and creativity!

Tuesday, June 23, 2015

Tuesday Tidbit: Technique Overhaul

   Welcome to another Tuesday Tidbit this month! Today I wanted to point out an awesome resource for stamping and crafting techniques. Are you ready for it?? It's super easy to access, and I promise you're going to love all the inspiration! It's CTMH's corporate Instagram account! Have you been following along this month?

   The last couple weeks CTMH corporate has been sharing different techniques on their Instagram account for stamping, distressing, inking, and so much more! There have been some old and new techniques (new to me at least), and I always love seeing comparisons of techniques on the same page.

Different types of coloring techniques: 1.) ShinHan Alcohol markers 2.) Paper piecing by stamping the image on several pattern papers and fussy cutting them out 3.) Watercolor pencils and water brush 4.) Blending Pens and ink pads

Sanding Kit techniques: 1.) Dry Embossing using the scoreboard and sand to expose the white core 2.) Circular sanding with sanding block 3.) Embossing Folder used and sanded to expose the white core 4.) Sanded Edges using the file

Inking techniques: 1.) Swipe stamping at a diagonal 2.) Spritz stamping by inking your stamp and spritzing it with water 3.) Watercolor blending done by putting ink colors on the All-Purpose mat, spritzing with water, applying the ink to your stamp, and stamping 4.) Ghost stamping done by stamping image in White Daisy ink on dark cardstock then re-stamping with a color slightly off-set from the original

   These are just a couple images that were shared last week. Make sure and get on Instagram and start following CTMH at @ctmhofficial to see all the fun techniques they have been sharing. Enjoy the rest of your week, and happy crafting! Until next time:

Here's to life, love, and creativity!


Thursday, June 4, 2015

Window Frame Project

   I am officially 31 weeks pregnant today! I can't believe how fast this pregnancy is going! I feel great and have no complaints. I feel very blessed so far, and hope it lasts through labor as well!

   Today I have a very special project I want to share with all of you! Back in April I had a lady I met at last fall's craft fair contact me. She was wondering if I could help her with a graduation project that she wanted to complete for her daughter's party in June. We had talked about it briefly at the craft fair last fall, and she was following up in hopes that I could be hired to design this project for her!

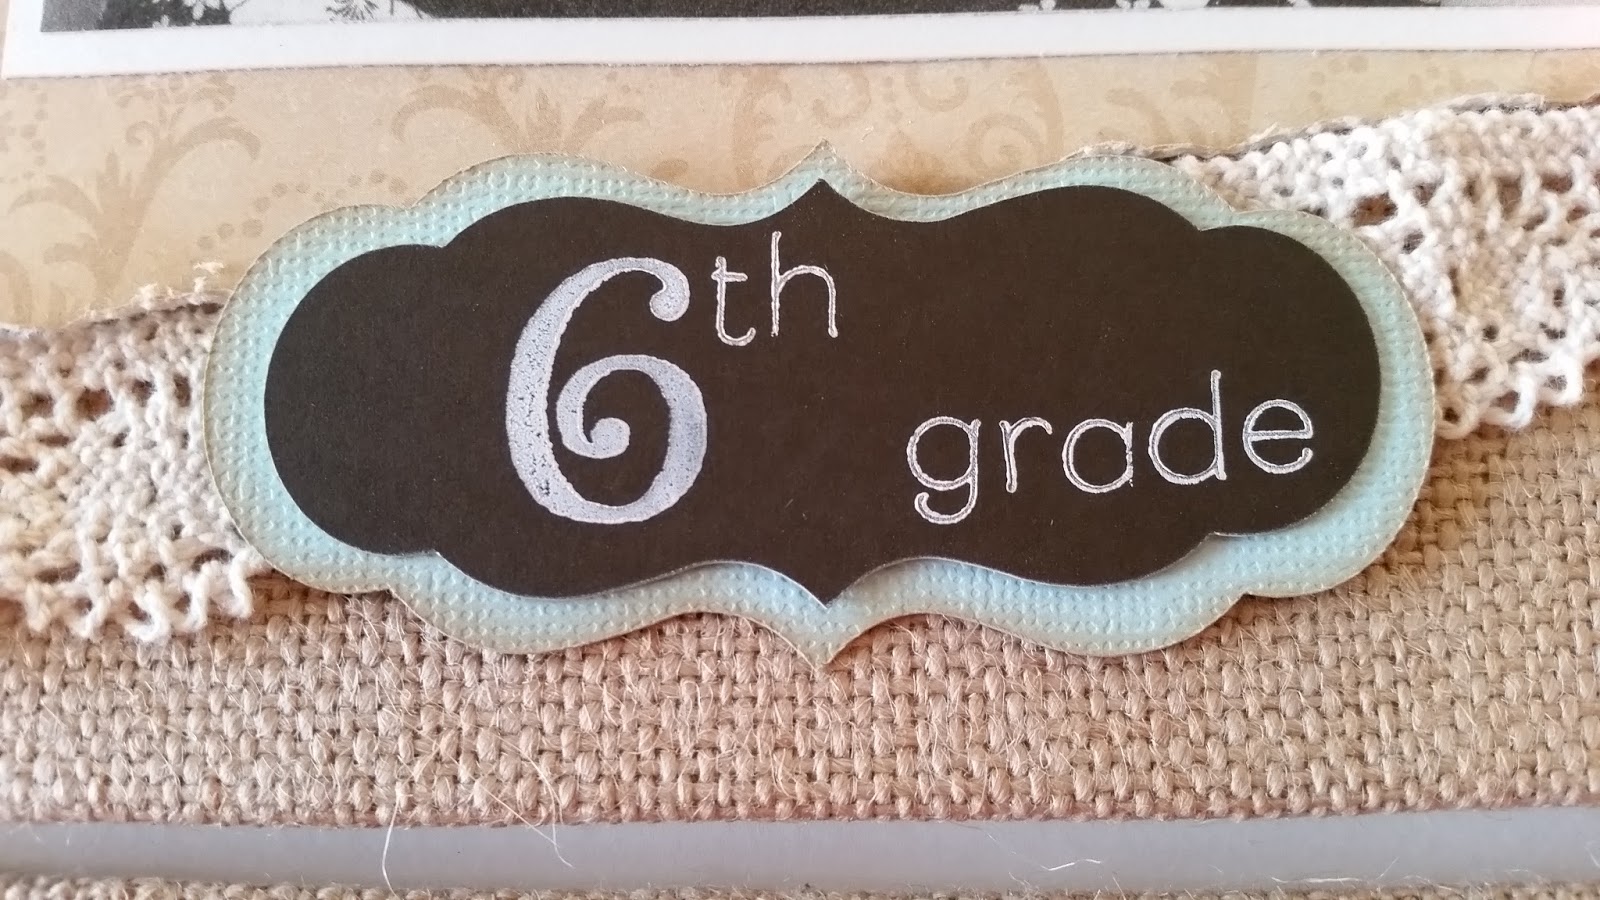
   I was flattered! I love doing projects for people, and this one was right up my alley! She had 2 windows with 9 panes in each. She was hoping that I could design a project so that she could showcase her daughter's photos from birth to 11th grade in each pane! She wanted a shabby chic type of feel, and she wanted to use a coral color and tiffany blue color as the many accents. She also had these burlap 8x10 boards that she was hoping to use on the back of each pane for each picture to sit on.

   So I met with her at the end of April before we left for New Orleans, and then started working on the windows a week after we got back! I finished up the final details Memorial Day weekend, and her other daughter picked them up from me last week!

   It was a little challenging trying to figure out the best way to attach the burlap boards without showing a lot of glue or adhesive from the front side, but I think I got it figured out after trying a couple things! 

   I am really pleased with how they turned out, and I wanted to share pictures* of them with all of you so you can see some of the stuff I have been working on lately!  I'm sorry if the pictures are a little blurry. It is hard to get a good picture against glass!

First Window Pane Completed
Close-up of the Name Banner I put in the upper corner of the frame. These were chipboard letters that I painted in white acrylic paint and then coated with Avery Elle Sea Glass pigment ink. To make sure the ink didn't rub off, I then coated each letter in a Matte finish Mod Podge.
Here is the first row of pictures. I used My Mind's Eye, Heidi Swapp, and Core-dinations papers for the whole project. I cut the branches and paper flowers on the Cricut using the Art Philosophy and Artiste cartridges. I then embellished the photos with brads, pearl gems, mini clothespins, Base & Bling charms, lace ribbon, and a border punch. 
Here is the second row of pictures. I tried to keep the theme similar throughout both windows, but accented and laid each pane out different for contrast! These pictures were embellished with more of the same die-cuts, pearl gems, paper doilies, hemp twine, Base & Bling charms, and some hand-stitching over vellum!
Here is the third and final row on the first window. I embellished these pictures with paper butterflies, paper flowers, pearl flourishes, lace ribbon, and a stick pin.
Here's the 2nd window completed!
Here's the burlap banner on the second window.
Here's the first row of the window at a closer view. I embellished these with similar items as the first window frame! I have pearl gems, a die-cut doily, hand-stitching, Base & Bling charms, hemp cord, and the same papers from the same lines as before!
Here is the second row of pictures. You can see that I embellished the panes very similarly between the two windows. It made it easier to tie everything together!
Here is the last row of pictures! I love the feminine feel of the whole project, and the vintage look with everything put together.
Here's a close up picture of the paper flower detail that I put on both bottom corners of the windows. I cut the rolled flowers from CTMH's Art Philosophy and Artiste cartridges, distressed the edges in Cashmere ink, rolled them using my quilling tool, and glued them together with Liquid gold (I mean glass)! Then I added some distressed branches, and some pearl finishes, and that was it! These were super fun to make!
The "titles" under each picture were stamped with White Daisy ink on chalkboard paper. Chalkboard paper isn't very porous, though, and the ink takes a long time to dry. So to make it smudge proof I embossed it with clear embossing powder and a heat gun. The two font stamp sets I used to create these titles were the "Glamour Lowercase Alphabet" and the "Artfully Sent Alphabet" both from CTMH!

   I hope you enjoyed looking at my finished project! I had a blast making it, and can't wait to hear how it's received at her graduation party in a couple weeks! If you have any questions on products used or techniques, please let me know! Otherwise, have a great rest of your week, and until next time:

Here's to life, love, and creativity!

*I was given permission by the mom to post these pictures to my social media sites.

Tuesday, May 19, 2015

Tuesday Tidbit: Swipe Hype Stamping

   Hey everyone! Welcome back to another Tuesday Tidbit! Today I want to revisit a fun stamping technique that will add texture and movement to any of your crafty projects! A fellow consultant on my team recently used this technique on her layout with an alphabet stamp set. I loved the look she got when she combined it with the Jackson paper collection, and decided it would be a great tip to share with you all this week!

   This technique is called "swiping", and I love using this technique to show direction or to just add extra dimension to some stamps! Here's a video by CTMH showing exactly how this technique works, and what it looks like on some awesome projects:


   I hope you all enjoyed seeing this technique up close! What will you use this technique on? Do you have some fun ideas in mind for your next project? I know I'll be revisiting this technique on my next projects! I just love the overall look!

   Don't forget you still have a little over a week to take advantage of my mystery hostess drawing this month! Just place an order with me or on my Online Shopping site, and you can be entered into the drawing for FREE hostess rewards of your choice!

  
   You can get all the information and specifics of this awesome monthly deal on my Steals & Deals page, but if you have any questions, please let me know! I would love to help you get your CTMH goodies this month!

   I hope you all are having a great start to your week, and are feeling more inspired after today's Tidbit! Until next time:

Here's to life, love, and creativity!

Monday, April 27, 2015

Artwork Spotlight: Seaside Layouts

   Happy Monday, everyone! I hope you all are enjoying the last Monday of April so far! I can't believe May is around the corner! Where does the time go??

   Today I would like to share some recent projects that I have been working on! I was able to get away to a scrappers retreat last weekend, and I worked on a lot of layouts! I am a slow crafter, but was pleased with myself for getting 12 pages done in 3 days! I started a couple other layouts before packing up, and made a couple cards, too! So pretty productive weekend for me!

   Because this month I am featuring the Seaside paper pack and embellishments in my workshops and classes, I decided to use up the rest of my Seaside kit and make some more layouts! I was able to make 5 two-page spreads with my WOTG, complements, and assortment! Here's what I completed:

I scraplifted this layout directly from Dana Kessler of "Scraptabulous Designs"! She inspires me in so many ways, and I love her creative and eye catching layouts!
I created this layout using a couple of the Seaside PML cards and some of my scrap pieces of Seaside paper and complements! I scraplifted the idea from Pinterest, but do not know the original designer.
I got the idea for this layout using the How-to Book "Reflections" by CTMH. I used pattern 2d and 10c in the book to help me plan my project! I also used a couple pieces from the Wildwood Assortment pack to embellish this page!
This is the Alternate layout that you can get instructions for when you purchase the Seaside WOTG kit! I wanted to include more pictures and embellishments on mine, so I spruced it up a bit to my liking!
Lastly, this is the layout I taught at my Cricut classes this month! I used Artbooking for all the Cricut cuts, and distressed in Desert Sand ink! When I took this picture, though, not everything was glued down yet. Oh well...you get the idea! I even came up with a "new" stamping technique for this layout! Check out the instructions below:

   To get the same look on the title as I did on the Cricut layout this is what you'll need to do:

1.) Pick out a light or medium tone color for the title. I used Sorbet for this stamp image.
2.) Now pick out a neutral complement to "weather" the main ink down. I used Desert Sand for this title.
3.) Ink your stamp in your base or main color completely.
4.) Now dust or sparingly add your neutral over top of your main color.
5.) Stamp on your scrap piece of paper or project, fussy cut (if desired), and adhere.

   I call this technique weathering an image. Sorbet was too bright and light of a color for the theme of this page. So I distressed it or "weathered" it to make it fit the rest of the motif! It tones it down more than the "rock n roll" technique, but yet you see both colors when it's stamped! It reminds me of weathered wood, so that's where I came up with the name! Not sure if it's a new technique or not, but I'm going to say it is! ;)

   I love this paper! It's so summery and beachy! Definitely gets me in the mood for some summer fun! You still have time to order your Seaside paper pack this month to play along with me and get inspired, too! Just let me know if you need help placing your order! Have a great rest of your week, and until next time:

Here's to life, love, and creativity!

Tuesday, January 6, 2015

Tuesday Tidbit: Emboss Resist Stamping

   Welcome to the first Tuesday Tidbit of the year! I hope you all are ready for an exciting tip and video today! I wanted to share an "old" technique called "Emboss Resist Stamping". Many of you have practiced this technique before, but I love getting new ideas and seeing new projects using old techniques! It makes me want to dig out my stash and start playing right away!

   So without further ado, check out this video from Monica and Kristine demonstrating this fun stamping technique:


   Are you feeling inspired to get out your embossing supplies now? I love this technique and how amazing the final project looks! I can't wait to use the new Ranger embossing powders from the Annual Inspirations Idea Book to start resist stamping this week!

   If you have any questions or need to get your hands on some embossing supplies, let me know! I would love to help you out! Make time to get crafty this week, and until next time:

Here's to life, love, and creativity!

Thursday, November 6, 2014

Fun Card Technique

   Good Morning, everyone! I have had a fun creative week so far! I had the second installation of the Christmas Card Buffet yesterday at my house, and it was a huge hit yet again! Everyone loved the new cards that I added, and all of them walked away with a decent handful of finished and fun greeting cards of all types! Thank you to all the fabulous ladies that came yesterday! I love having creative time with all of you!

   I also have been working on getting my projects finished for the craft fair next weekend! I'm nervous that I won't have enough stuff done, but hopefully I can buckle down these next few days and crank out a bunch of projects! If you need me I will be in the my craft room with a coffee! If you're around the Hastings, MN area, you should stop by and see me next weekend at Regina Hospital-Chapel Lobby! I would love the feedback on my booth and projects!

   Today, though, I wanted to share with all of you a super fun technique that CTMH put on their blog yesterday! Some of you might have seen this already, but it is just too fabulous not to share! I also love that they broke the technique down for us and showed every step in creating this amazing card!


   Check out how to make this card and others like it on the CTMH blog! You definitely can have a ton of fun creating with this style!

   If you would like to order the supplies needed to make your own color splat cards, make sure and visit my Online Shopping Site! You can get all the tools, inks, embellishments, and stamp sets that you'll need to recreate this perfect fall art!

What Tools You’ll Need:
D1604 My Acrylix® Season of Thanks
C1589 My Acrylix® Lifetime of Happiness
Z2123 Goldrush Exclusive Inks™ Pad
Z2118 Desert Sand Exclusive Inks™ Pad
Z2137 Olive Exclusive Inks™ Pad
Z2191 Sunset Exclusive Inks™ Pad
Z2101 Autumn Terracotta Exclusive Inks™ Pad
Z2162 Honey Exclusive Inks™ Pad
Z2643 Canary Exclusive Inks™ Pad
Z2172 Whisper Exclusive Inks™ Pad
Z2642 Flaxen Exclusive Inks™ Pad
Z2641 Glacier Exclusive Inks™ Pad
Z1380 Spray Pen
1778 My Acrylix® Spritz Cleaner
Z697 Round Sponge
Z2045 All-Purpose Mat

   If you have any questions, please let me know! I would love to help you get crafty this week! Have a wonderful Thursday, everyone, and until next time:

Here's to life, love, and creativity!

Tuesday, October 14, 2014

Tuesday Tidbit: Back to Basics

   Hi, everyone! Sorry I have not been updating as much I wanted to these last couple days! I have been working on finishing the office/craft room this week! It's really starting to come together, and I'm excited to create in this new space! Hopefully I will have a video tour of the craft room uploaded for you all by the end of the month! Here's hoping!

   Today, though, I wanted to go back-to-basics and share a quick video I made this week for a virtual workshop I hosted online!

   This video is all about getting that perfect stamped image, and all my little tips that help me achieve the perfect image almost every time! I hope you enjoy my video! Let me know if there's other videos you would like to see in the future!

  
   Everyone needs a quick reminder of the basics every now and then! I hope this inspires you to get crafty this week! Until next time:
Here's to life, love, and creativity!

Tuesday, September 23, 2014

Tuesday Tidbit: Burlap Bags

    Today is officially the first day of fall! I absolutely LOVE fall! It's my favorite time of year for sure! I love the colors, jeans and sweatshirts, all the fun and cute decorations, the cooler temperatures, the amazing foods (hello cider donuts), and of course football games!


    So I think it's only appropriate that today's Tuesday Tidbit is about some cute Fall decorations using CTMH's amazing burlap bags! Burlap is very big right now, and you can find burlap decor everywhere! Plus it's a very fun and natural look that you can use all season long!

    Did you know that CTMH sells a pack of 3 burlap bags for only $4.95?!!? Exciting, right? Burlap can be expensive, but CTMH sells 3 bags in a pack for less than $2 each! Awesome!!!

   I have used these super cute Burlap bags a couple times to make some personalized party and home decor! Some of you might have even attended my workshop last fall using these fun bags! Here's my example from last year's workshop:


    I cut a fun tag from the Art Philosophy Cricut cartridge, and used the Happy Autumn stamp set to decorate the front of this cute burlap bag! You could use this as a silverware holder at a gathering, potpourri bag around the house, or just as an accent in your fall decor display! These also make really cute and thoughtful gift bags, too!

    CTMH's burlap bags have a tighter knit to them to make it easier to decorate, but I still used a scrap piece of cardstock tucked inside my bag while assembling my project!

    The best adhesive to use when decorating these cute bags is CTMH's Liquid Glass! If you don't have any Liquid Glass yet, you definitely need to add it to your next order! It's the "liquid duct tape" all all adhesives!

   I have some more creative inspiration for you using these awesome bags:

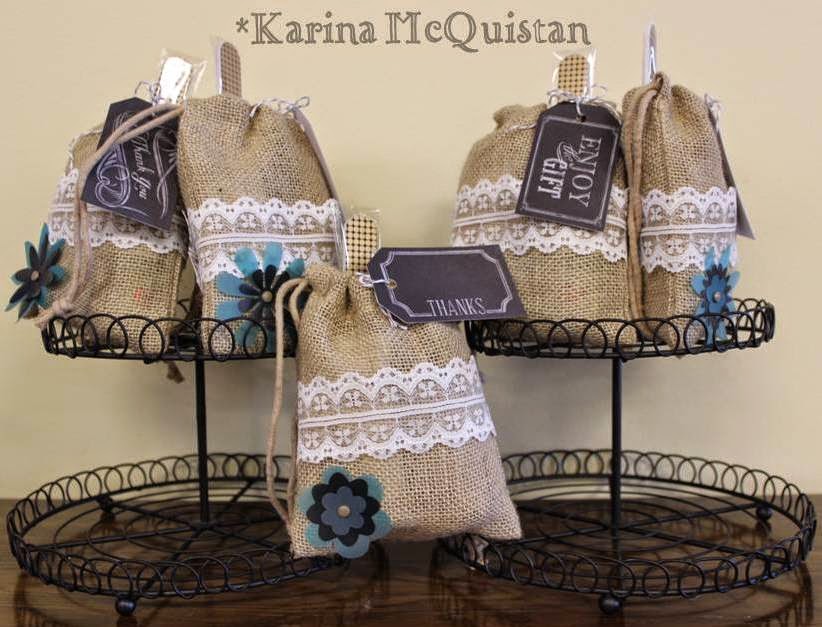
These were prize bags I had at my cousin's Bridal Shower last month! I have to confess, though, that these are not CTMH burlap bags. I had to use larger bags from a store in order to fit all the prize pieces I had for each bag. However, I wanted to show off what all you COULD do with the CTMH burlap bag! I used Liquid Glass to adhere the lace ribbon around the middle, but you can handstitch it on there as well (I hand-threaded the grey Baker's twine to the bag no problem)! I then used a brad to adhere the vellum flowers to the bag on the bottom corner! It was super easy and came together in less than 30 minutes!
You can also stencil, paint, and/or stamp directly on these bags, too! It's super easy, and really adds a personal touch! This project was done by Michelle Snyder (who has an amazing talent and is one of my creative role models)! To get the "true" color to show up, use pigment-based inks or the new ShinHan Touch Twin markers! You'll love this technique! Make sure and have a scrap piece of paper in between the burlap layers, though, because the ink will bleed underneath!
   
    I hope this has inspired all of you to get creative this week and start making some super cute fall decor! If you have any questions about using these cute Burlap bags, let me know! Otherwise, you can order any of the supplies you need on my online shop at your convenience! Have a great Tuesday, everyone, and until next time:
Here's to life, love, and creativity!

Tuesday, September 16, 2014

Tuesday Tidbit: Versamat

    Hello from Grand Marais, MN! Sorry I have not been able to post much these last few days because we have not had any connection service! However, we found a coffee house in town today to get some late breakfast and caffeine! So I'm back!

    Today I wanted to talk about one of my favorite tools ever: the Versamat (Z1279)! I only recently started to use the Versamat, and now wonder why it took me so long to get one!

    Now most of you know that one of my first tips when we start stamping projects is to make sure you have the foam insert under your project! If you have ever tried stamping without the foam mat underneath, you know that the impression does not always turn out.

   Well the Versamat is a double-sided, 13x13 mat! One side has a hard, self-healing, work surface  containing a 12x12 ruler grid, and on the other side is a large form mat!!! So now you can stamp multiple projects at one time without losing the foam insert to your stamps! I love it!

This amazing double-sided mat is only $14.50!!!
    This mat is also a STEAL at only $14.50 through CTMH! If you don't have one already, you are going to want one! Believe me! I waited way too long to get one, and now I have no idea how I would craft without it! Get yours today on my online shopping site, and start crafting with ease in no time!

    Hope you all are having a great start to the week! Until next time:

Here's to life, love, and creativity!

Tuesday, September 9, 2014

Tuesday Tidbit: Stencil It

    I have another Tuesday Tidbit to share with you! Today I wanted to share one of my favorite techniques: stenciling! I have been stenciling for as long as I can remember. When I was a kid, I had a book about making your own stencils, and I would sit in our family craft room cutting and designing stencils to use on my projects for 4H! It was so much fun!

    When CTMH came out with the Artbooking Cricut Collection I knew I would need to try stenciling and masking some of the overlay backgrounds from this amazing cartridge! I even played with cutting overlays from acrylic sheets to make a more permanent stencil background! Some of you might remember seeing my hearts stencil at the February Valentine's Day Card Workshop!

    It's hard to try and take a picture of an acrylic stencil, so I thought I would share a video that CTMH made! In this video, Jill makes a mini album using a couple keys from the Artbooking cartridge. However, I want you to pay close attention to the stenciling technique she used to sponge the circles onto her mini album (right around 2:30 in the video)! I think you're going to love this! Check it out:

 
    Isn't that super cute and easy? I love that she used the stencil piece on her project, too! No scraps left behind, people! Notice how she used pigment inks instead of our dye inks, too! This is so that the colors show up "true to shade" on the darker cardstock background! The possibilities are endless with this technique!

    Well I hope you enjoyed this quick Tuesday Tidbit! If you have any questions or would like to order the Artbooking Cricut Collection for yourself, please contact me! I would love to help you start stenciling your projects! Make sure you take some time this week to get creative, and until next time:

Here's to life, love, and creativity!

Tuesday, August 26, 2014

Tuesday Tidbit: Pigment vs Dye Inks

    Good morning, paper lovers! Welcome back to Tuesday Tidbit! Today I wanted to share a video that I think is super helpful when it comes to deciding when to use pigment or dye based inks!

    I think everyone that starts stamping runs across the issue of pigment versus dye inks, and I want to help make it a little clearer for those that have had questions or would like a quick refresher!

    Remember pigment = paint so it's going to be thicker, takes longer to dry (but can be heat set to speed it up), and the color is the "true" shade because the color sits on top of your project.

    In comparison, dye ink = dye! Pretty easy to remember, right? These inks dry fast, will soak into the project to "dye" the image in place, and are water soluble so can be mixed with water to soften the color or create a fun artsy technique! So if you stamp an image in blue dye ink on yellow paper, the image will show up more of a green color when dry!

    Both of these inks are super useful when stamping projects, but knowing the differences can help you determine the "look" of your finished project! Check out the video to see what I mean:


    I hope you enjoyed this helpful video! If you have any questions, though, please do not hesitate to ask! Have a great Tuesday, and until next time:

Here's to life, love, and creativity!

Tuesday, July 22, 2014

Tuesday Tidbit: Kiss Your Stamps

    Welcome back to Tuesday Tidbit! I hope you all enjoyed last week's first post of this series! This week I want to share a stamping technique with you called "Kissing"! This is a really fun way to add extra dimension and texture to your stamped images! It's also a simple and easy way to re-vamp some of those old stamps to make them different and new! Check out the video below for more information on how to "Kiss" your stamps:


    Isn't that awesome? I love this technique, but especially with some of those amazing background stamps that CTMH has in their Idea Book! If you have any questions or would like more information, please let me know! Make time to get crafty this week, and until next time:

Here's to life, love, and creativity!