Background

Showing posts with label Party Planning. Show all posts

Thursday, June 4, 2015

Window Frame Project

   I am officially 31 weeks pregnant today! I can't believe how fast this pregnancy is going! I feel great and have no complaints. I feel very blessed so far, and hope it lasts through labor as well!

   Today I have a very special project I want to share with all of you! Back in April I had a lady I met at last fall's craft fair contact me. She was wondering if I could help her with a graduation project that she wanted to complete for her daughter's party in June. We had talked about it briefly at the craft fair last fall, and she was following up in hopes that I could be hired to design this project for her!

   I was flattered! I love doing projects for people, and this one was right up my alley! She had 2 windows with 9 panes in each. She was hoping that I could design a project so that she could showcase her daughter's photos from birth to 11th grade in each pane! She wanted a shabby chic type of feel, and she wanted to use a coral color and tiffany blue color as the many accents. She also had these burlap 8x10 boards that she was hoping to use on the back of each pane for each picture to sit on.

   So I met with her at the end of April before we left for New Orleans, and then started working on the windows a week after we got back! I finished up the final details Memorial Day weekend, and her other daughter picked them up from me last week!

   It was a little challenging trying to figure out the best way to attach the burlap boards without showing a lot of glue or adhesive from the front side, but I think I got it figured out after trying a couple things! 

   I am really pleased with how they turned out, and I wanted to share pictures* of them with all of you so you can see some of the stuff I have been working on lately!  I'm sorry if the pictures are a little blurry. It is hard to get a good picture against glass!

First Window Pane Completed
Close-up of the Name Banner I put in the upper corner of the frame. These were chipboard letters that I painted in white acrylic paint and then coated with Avery Elle Sea Glass pigment ink. To make sure the ink didn't rub off, I then coated each letter in a Matte finish Mod Podge.
Here is the first row of pictures. I used My Mind's Eye, Heidi Swapp, and Core-dinations papers for the whole project. I cut the branches and paper flowers on the Cricut using the Art Philosophy and Artiste cartridges. I then embellished the photos with brads, pearl gems, mini clothespins, Base & Bling charms, lace ribbon, and a border punch. 
Here is the second row of pictures. I tried to keep the theme similar throughout both windows, but accented and laid each pane out different for contrast! These pictures were embellished with more of the same die-cuts, pearl gems, paper doilies, hemp twine, Base & Bling charms, and some hand-stitching over vellum!
Here is the third and final row on the first window. I embellished these pictures with paper butterflies, paper flowers, pearl flourishes, lace ribbon, and a stick pin.
Here's the 2nd window completed!
Here's the burlap banner on the second window.
Here's the first row of the window at a closer view. I embellished these with similar items as the first window frame! I have pearl gems, a die-cut doily, hand-stitching, Base & Bling charms, hemp cord, and the same papers from the same lines as before!
Here is the second row of pictures. You can see that I embellished the panes very similarly between the two windows. It made it easier to tie everything together!
Here is the last row of pictures! I love the feminine feel of the whole project, and the vintage look with everything put together.
Here's a close up picture of the paper flower detail that I put on both bottom corners of the windows. I cut the rolled flowers from CTMH's Art Philosophy and Artiste cartridges, distressed the edges in Cashmere ink, rolled them using my quilling tool, and glued them together with Liquid gold (I mean glass)! Then I added some distressed branches, and some pearl finishes, and that was it! These were super fun to make!
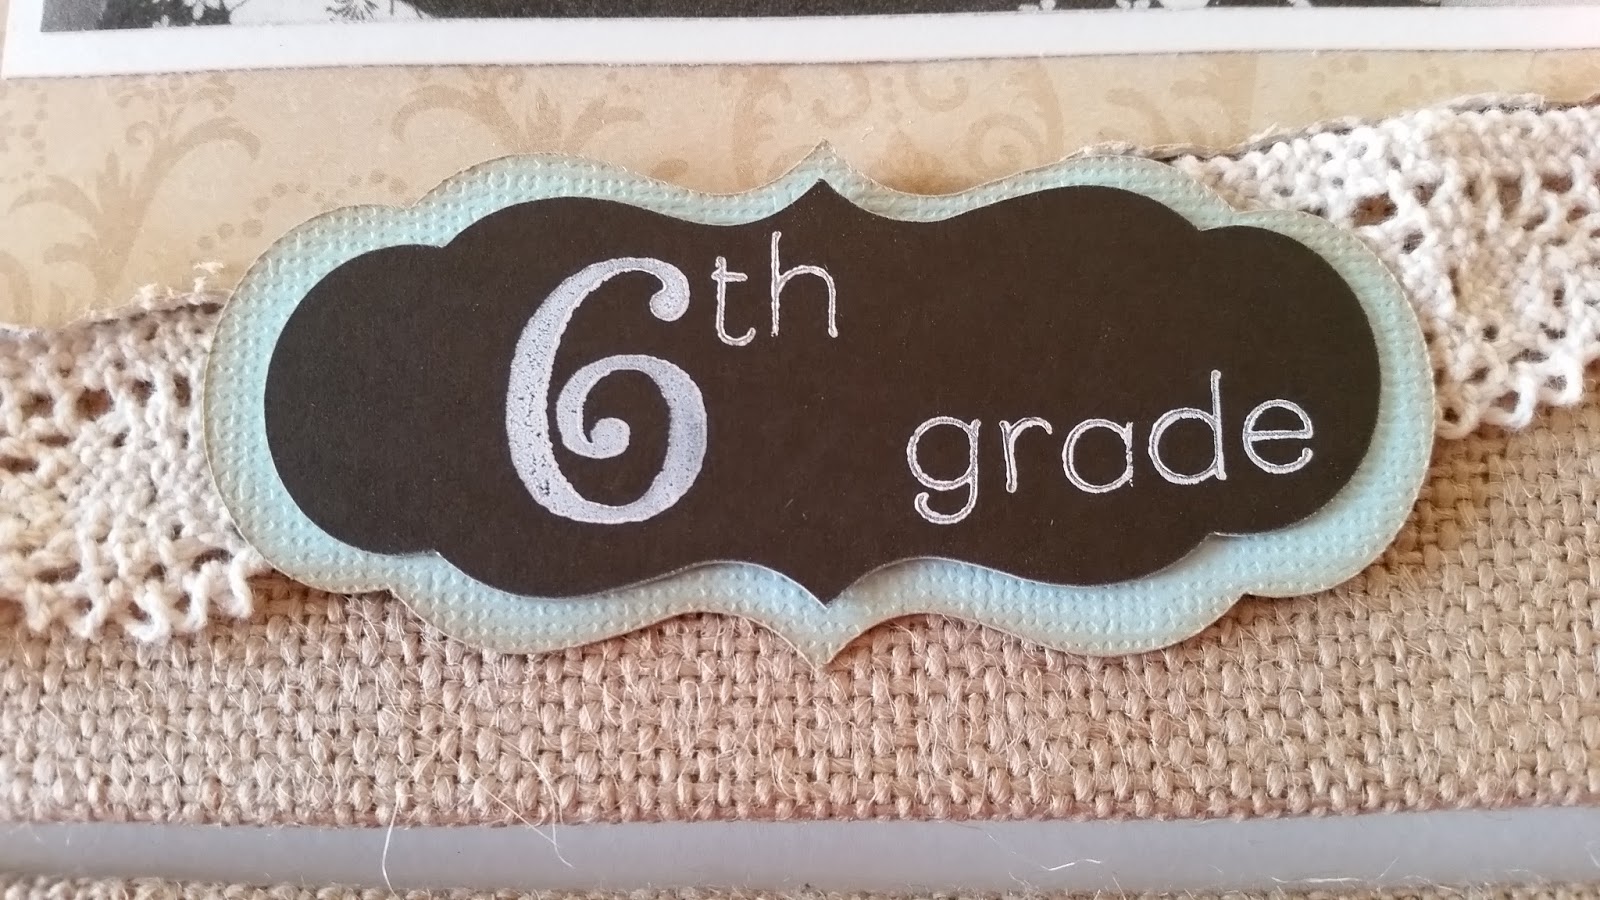
The "titles" under each picture were stamped with White Daisy ink on chalkboard paper. Chalkboard paper isn't very porous, though, and the ink takes a long time to dry. So to make it smudge proof I embossed it with clear embossing powder and a heat gun. The two font stamp sets I used to create these titles were the "Glamour Lowercase Alphabet" and the "Artfully Sent Alphabet" both from CTMH!

   I hope you enjoyed looking at my finished project! I had a blast making it, and can't wait to hear how it's received at her graduation party in a couple weeks! If you have any questions on products used or techniques, please let me know! Otherwise, have a great rest of your week, and until next time:

Here's to life, love, and creativity!

*I was given permission by the mom to post these pictures to my social media sites.

Monday, December 22, 2014

Day 3: Wrapping Paper Solutions

    Sorry I didn't get a chance to keep up on my posts these last few days, friends. It has been a run-around, crazy mess in the McQuistan household. Ian was working nights this last week, and it has been a really tough week. He barely had any sleep, was called in to work in the middle of the night a few times, had super sick patients, and was helping battle the atrocious Flu season we have entered.

    I have been up a lot more this week, too, with his night calls. So I have been tired and groggy all this week as well (but not quite in the same way that Ian is I'm sure!!).  I also had a dentist appointment and needed to get some packages together so I could mail them out before the weekend. I needed to take some time to pick up and clean our house a little bit (it was starting to look like a tornado in here). So yeah....I put off the blogging and crafting, and worked on family stuff for awhile.

   We also went to Iowa this last weekend to visit friends and family before Christmas and to attend a family party. This week we need to finish up some last minute shopping, wrapping, and other little things before we head to Wisconsin for my family Christmas. So it's definitely crazy busy!

    So today I'm actually showing you Day 3 of our 12 days of a CTMH Christmas. It's funny because I was going to do this whole feature on creating your own wrapping paper and personalized gift bags, and then last week CTMH posted a similar idea on their blog! So I'm going to feature the same thing today!

    I love the look of personalized gift decor! It's so much fun to make and decorate, and it helps me use up my stash! Plus it really doesn't take long to make, and gives me a reason to get crafty!

A fellow consultant had these CTMH Burlap bags on her blog. They were decorated using the Christmas mini stamps, twine, mini clothespins, and the retired Sparkle & Shine fabric set! I love how cute these little bags are!
Decorate some of CTMH's burlap bags with ribbon, a tag, and some embellishments! These bags are perfect in stockings, for teacher gifts, and for those odd shaped small items that you want to stash away on Christmas Day!
Here are a couple examples of paper gift bags I bought from the Dollar Store and decorated with simple Cricut cuts and embellishments! I love how these turned out, and they were so simple to put together!
Fellow consultant, Joy Tracey, made this gorgeous gift bag using Cricut cuts and glitter paper!
Joy Tracey also made this gift bag! See how awesome it looks with just a couple simple cuts? I love these ideas!

    I also love using Christmas scrapbook paper to make envelopes for my Christmas cards. It's a great way to use up my stash, and to personalize my cards just a little bit more! This is how I do it:

1.) I measure my card that I need an envelop for. This one is almost 5"x7". I then use WRMK Envelope Punch Board to figure out how much paper I need and at what size.
2.) According to the Punch Board, I needed a piece of paper 9 1/2" x 9 1/2". I use pattern paper that is printed on one side and white on the other.
3.) I flip the pattern paper over and score the white side of the paper according to the board instructions.
4.) This is what the scored piece looks like notched and scored.
5.) I then round the corners of my scored piece. There is a corner rounder on the punch board, but mine needs some oil and sharpening. So I chose to use my CTMH rounder which allows me to punch through a couple sheets at a time.
6.) I fold the paper along the scored lines with the pattern on the inside of the envelope.
7.) Last, I run a couple lines of permanent adhesive on either side of the inside flaps, and glue my envelope together. Now I have a fun Christmas envelope to match my homemade Christmas cards! It's super easy to do and doesn't take much time at all! I love it!

    The possibilities are endless! Plus it's a great way to get creative during the hustle and bustle this holiday season! Check out more ideas on personalizing gift packaging and how to make some fun Cricut packages on CTMH's blog today! I hope this has inspired you to get crafty this weekend! Until next time:

Here's to life, love, and creativity!

Thursday, September 25, 2014

Falling in Love with Mini Stamps

    I have another amazing set of projects to share with you today from CTMH's design team! I love all the projects that they have been putting out all month, and hope you have enjoyed them as well!

    If you haven't already fallin' in love with the #30yearsofhappy stamp set this month, you definitely will! I love these cute mini stamps and all the adorable mini projects that have been made using them! Here's your inspiration to get crafty this week:

(9.17) Simple and sweet card with a little bit of shimmer trim peeking out!
(9.18) It's not too early to get started on making gift tags for the upcoming gift giving season!
(9.19) This cute little party favor bag is perfect for any type of party! Simple yet effective = LOVE IT!!!
(9.20) More CAS (Clean and Simple) card ideas for some quick and easy cards to add to your stash!
(9.21) CTMH's Canvas bags are perfect for treats, holding mini cards, home decorating, and so much more! Spruce up the bag with simple touches like ribbon and tags, and you have the perfect accent piece!
(9.22) Embossing powders are back and better than ever! Using them on mini cards like this give just the perfect amount of pop to your project! Plus did you notice the mini staples.....ahhhh...tool crush!
(9.23) I love this hybrid tag-card idea from the Art Philosophy Cricut cartridge! Want to know how to make this adorable card? Check out the video CTMH put on Instagram!
(9.24) I love the use of the #30yearsofhappy stamp set with the Artfully Sent Cricut Cartridge!
    You still have time to get this FREE stamp set for yourself! Just place an order of $30 or more in your favorite stamp sets, and you automatically qualify for the #30yearsofhappy set! Join me in the mini craze today, and start falling in love with your own mini projects! Until next time:

Here's to life, love, and creativity!

Tuesday, September 23, 2014

Tuesday Tidbit: Burlap Bags

    Today is officially the first day of fall! I absolutely LOVE fall! It's my favorite time of year for sure! I love the colors, jeans and sweatshirts, all the fun and cute decorations, the cooler temperatures, the amazing foods (hello cider donuts), and of course football games!


    So I think it's only appropriate that today's Tuesday Tidbit is about some cute Fall decorations using CTMH's amazing burlap bags! Burlap is very big right now, and you can find burlap decor everywhere! Plus it's a very fun and natural look that you can use all season long!

    Did you know that CTMH sells a pack of 3 burlap bags for only $4.95?!!? Exciting, right? Burlap can be expensive, but CTMH sells 3 bags in a pack for less than $2 each! Awesome!!!

   I have used these super cute Burlap bags a couple times to make some personalized party and home decor! Some of you might have even attended my workshop last fall using these fun bags! Here's my example from last year's workshop:


    I cut a fun tag from the Art Philosophy Cricut cartridge, and used the Happy Autumn stamp set to decorate the front of this cute burlap bag! You could use this as a silverware holder at a gathering, potpourri bag around the house, or just as an accent in your fall decor display! These also make really cute and thoughtful gift bags, too!

    CTMH's burlap bags have a tighter knit to them to make it easier to decorate, but I still used a scrap piece of cardstock tucked inside my bag while assembling my project!

    The best adhesive to use when decorating these cute bags is CTMH's Liquid Glass! If you don't have any Liquid Glass yet, you definitely need to add it to your next order! It's the "liquid duct tape" all all adhesives!

   I have some more creative inspiration for you using these awesome bags:

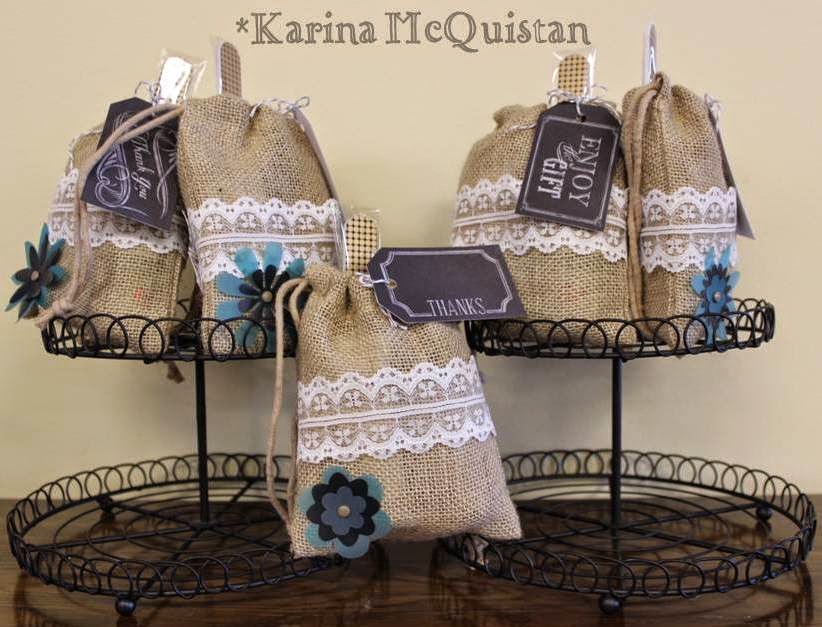
These were prize bags I had at my cousin's Bridal Shower last month! I have to confess, though, that these are not CTMH burlap bags. I had to use larger bags from a store in order to fit all the prize pieces I had for each bag. However, I wanted to show off what all you COULD do with the CTMH burlap bag! I used Liquid Glass to adhere the lace ribbon around the middle, but you can handstitch it on there as well (I hand-threaded the grey Baker's twine to the bag no problem)! I then used a brad to adhere the vellum flowers to the bag on the bottom corner! It was super easy and came together in less than 30 minutes!
You can also stencil, paint, and/or stamp directly on these bags, too! It's super easy, and really adds a personal touch! This project was done by Michelle Snyder (who has an amazing talent and is one of my creative role models)! To get the "true" color to show up, use pigment-based inks or the new ShinHan Touch Twin markers! You'll love this technique! Make sure and have a scrap piece of paper in between the burlap layers, though, because the ink will bleed underneath!
   
    I hope this has inspired all of you to get creative this week and start making some super cute fall decor! If you have any questions about using these cute Burlap bags, let me know! Otherwise, you can order any of the supplies you need on my online shop at your convenience! Have a great Tuesday, everyone, and until next time:
Here's to life, love, and creativity!

Thursday, September 18, 2014

Inspiration Overload

    Good Morning from Grand Portage! I hope you all are enjoying your week! We are having a nice time up here along the lake, but man did it get chilly this week! It definitely feels like fall up here! I will be sharing some photos from our trip later next week!

   Today I wanted to get you all caught up on the super cute projects CTMH has been sharing this week using this month's #30yearsofhappy stamp set! I love this set! It's so versatile and handy for all types of projects! Here are the adorable and inspirational projects CTMH has shared on Facebook and Instagram this week:

(9/8) Why not mount a card on a cute background piece like this chevron one from the Basic Fundamentals Pack? I love this look, and can't wait to try this when I get home!
(9.9) Look at this super cute mini treat bag using the new Adventure Fundamentals paper pack! Love this!
(9.10) Need a party favor? Try making a super cute fortune cookie favor! Need help? Check out the video CTMH posted on how to assemble this cute little project!
(9.11) I love making mini cards, and what better way to accent a homemade card than with a cute homemade envelope!

(9.12) This is such a fun color combo on this cute mini card!

(9.13) Alter a stamp by fussy cutting only the image you want on your project! In this case, the "hey" was fussy cut off of the Cranberry and Canary colored butterflies!
(9.14) Need a quick gift? Why not use CTMH's Designer Creations Slate Bag and add some quick decorations using the #30yearsofhappy stamp set, a die-cut, a mini clothes pin, and some Baker's Twine!!??!!

(9.15) Make a small image pop by heat embossing it with CTMH's new embossing powders!

(9.16) Why are mini things so stinking cute? This mini box was cut on the Cricut using the Whimsy Fundamentals Paper pack! Add some quick embellishments and some love notes, and you have a super cute gift set that anyone would love!

    I love all the projects CTMH is sharing this month! I cannot wait to try out a bunch of these for myself! You can get all the supplies you need, including the #30yearsofhappy stamp set, on my online shop! Act quick, though, because you only have a few days left to get this super cute stamp set for FREE this month!


    I will be back home on Saturday if anyone needs help placing their September order! Have a great rest of your week, and I will see you all soon! Make time to get creative this week, and until next time:

Here's to life, love, and creativity!

Wednesday, August 27, 2014

Party Time

    Happy Wednesday, everyone! I hope you all had a wonderful week this week! The dog days of summer are officially upon us up here in Minnesota, and just in time for the Minnesota State Fair! Ian and I are planning on going to the fair this year, and I'm super excited!

    I love fairs! Maybe it has something to do with the great memories I have of being in 4H when I was younger! I really love looking at all the exhibits, watching the cattle judging (it's the best), and of course eating all the amazing (and oh so healthy) food! I'm hoping that we can go while it's still cool this week, but we'll see how the weather holds up for us!

    Today I wanted to show you a little project I did a couple weeks ago! My cousin, Kim, is getting married in October and I am in the wedding! So two weekends ago was when we (my sister, the matron of honor, and I) threw her a bridal shower and bachelorette party in Southern Wisconsin! It was a ton of fun, and I think the party turned out really cute! I didn't have a lot of time to plan everything, but I always do better when I'm under pressure any way! Besides, I don't have time to change my mind or my decor when I only have a couple days to get it all together!

    I ended up ordering the Bridal Shower invitations online through "Wedding Paper Divas" because I was not home enough in July to make them myself. We knew we were going to have a brunch style shower, and WPD had the perfect chalkboard themed invite! I added the details and played with some shading, and TA-DAH!!!.....completed invites!


    I sent the shower invites out with a Save-the-Date notice for the Bachelorette Party. I wanted to make these a little more personal, but also needed to finalize some details before the actual invitations were sent. These turned out super cute, too! I ordered the formal side of the Bachelorette Invitations through Snapfish, and then printed them at Walmart here in town!

The save-the-date information for the Bachelorette party.
The formal invitation for the Bachelorette party.
    I then cut out a lingerie die-cut on my Cricut and embossed it to look like lace. I printed some more detailed information from my computer and pasted that to the back of the lingerie, and sent those out to the ladies invited to the Bachelorette! They turned out super cute, too!


    Then last week I needed to start finalizing details and come up with party decor! I love planning parties, but this was definitely last minute for me! I decided to use the chalkboard theme to match the shower invitations, and then I added pops of color using Kim's wedding colors (teal and burnt orange)! It was really fun to put together, and I got to play in my new craft room on my new island! Woohoo!


    First, I wanted to come up with a centerpiece for each table. I saw a chalkboard technique on Pinterest using wine bottles, and thought I would try it! I had a lot of old wine that we were given a couple years ago (and forgot about), and I had chalkboard paint left over from other projects! So I soaked the bottles, removed the labels, sanded, primed, and painted them to make chalkboard wine bottles!


    I then used CTMH's Chalk Marker to write the word love on each bottle! I wrapped the neck in lace and teal ribbon, and then used leftover curly ting from my wedding (2 years ago) in each bottle! I then die-cut some paper hearts from some faux vintage book paper to place around each bottle on the tables.

    I also used the same painting technique on some Ikea square vases and wrote "happily ever after" (one word on each vase). Then I put some curly ting and some faux fall branches (also left over from my wedding) in each one for the entry table. We had chalkboard name tags and journal cards from the Picture My Life: For Always collection on the table, too! Everyone that attended could leave a note for the bride, and then we put the cards and pictures in a small album for her!


    The next thing I made were burlap banners for the food and gift tables! These were messy little guys to make, but super easy and really cute when they were done! I had a roll of landscape burlap from Menards that I had used at Kim's baby shower last year. I cut triangle banners from this, sewed them together with my mini-craft sewing machine, and then added lace, ribbon, and paper flowers to the ends! They really added a rustic country theme to the simple decor I had going! It was really pretty!


    Here's a couple pictures of our food table set up for brunch:

Muffins, cheesecake bars, fruit and veggie pizzas, mini donuts, and mini quiches
Fresh fruit and yogurt bar, homemade granola, coffee cake, and mini bagels with cream cheese
    I found some ideas for games on Pinterest, and then made them my own to match the decor! The first game we played was a matching game using quotes from romantic movies! The ladies worked on it while they enjoyed their brunch! Then I gave prizes to the top two highest scores!


    Then we played another game where the ladies had less than a minute to study the bride. Then the future bride went into the next room, and the ladies were given a questionaire about what the bride was wearing! It was a ton of fun, and everyone did really well! I gave prizes to the top three highest scores for that game since we had a tie!


   The prize bags were super cute! I used burlap bags, the same lace that I used on the wine bottles, and some vellum flowers that I had in my stash! I used Liquid Glass to glue the ends of the lace to the bag, and used a brad to secure the flower to the front! Then I used pre-printed tags from "My Mind's Eye Chalk Collection" and tied those to the top of the bag!


    Each prize bag was filled with a nail file, my favorite color of nail polish from "Sinful Colors" called "Nirvana" (very pretty for fall), a fall mini-mason jar candle from Bath & Body Works, a chocolate candy bar, mini hand sanitizer from Bath & Body works (also a new fall collection scent), and mini hand lotion! Each bag was less than $10/bag! I love party planning!

    We had a great time, and the Bachelorette later that night was a huge hit as well! We had a mini wine and hors d'oeuvres bar, hung out in the hotel room for cocktails, and went to The Melting Pot for dinner! It was the perfect night out with the girls! :)

    So that's what I was busy doing at the beginning of this month! I hope you enjoyed looking at all my party planning efforts! Until next time:

Here's to life, love, and creativity!