Background

Showing posts with label Home Decor. Show all posts

Monday, January 9, 2017

Make It Monday

   Good Morning, everyone! I hope you all had a great weekend, and stayed warm/safe with the crazy weather and cold temps going around the states right now.

   I have been meaning to post a couple projects I did in December, but with the holidays I never had a chance to get them posted. Well today is your lucky day to see them! So consider today a Make It Monday/Throw Back Thursday combo-type of post! hehe

   I made these two projects as prizes for my husband's work Christmas party. They were a ton of fun to make, but, also, I had to throw them together quite quickly with all the other things on my December to-do list! 

   This first project was inspired by a fellow consultant, Donna Cosgrove, and her tree project she posted on Instagram! I purchased 3 paper mache trees from Hobby Lobby, spray painted them white, and decorated them using Oh Deer papers and papers from an old DCWV Collection called Winter in the Woods.

I forgot to take decent pictures of these at home, and had to snap this shot with my cell phone right before the party.

   Each double-sided strip is 1/2"x 6", and is hot glued to the tree. I started gluing along the bottom and worked my way to the top. The exception to this was the smallest tree. The top row's strips are only 1/2"x 3" because of the spacing.

   Next I embellished each tree. To do this I used Thin Cuts-Stars set from CTMH, and the Stars thin waver dies from Heidi Swapp to make the toppers for each tree. I die-cut these from CTMH gold glitter paper using a mirror image technique. To do this technique first die-cut with the glitter paper facing up. To get the "mirror image", die-cut the same image, but with the glitter paper facing down. This way you can glue the two pieces back-to-back without any white backing showing (this works best with non-symmetrical images such as these stars). 

   I then embellished around the tree using the different sized circles from the Gold Glitter Fundamental stickers that CTMH had in the last Annual Inspirations Idea Book. I love these sticker sheets, and bought a ton of extras so I had plenty to spare while decorating these trees! You can never have enough gold glitter!

   The next project I did was a paper mache word made from marquee letters. I purchased these letters from Hobby Lobby as well, spray painted them white, and decorated them with the same paper from DCWV, and some silver glitter snowflakes! This was a super cute and easy project to whip up, but still looks amazing and elegant as a display!


   I traced each letter by hand onto the paper I wanted to use. I cut these out, ink distressed the edges (in this case with CTMH Desert Sand ink), and glued the paper to the letter. I then used the Thin Cuts-Snowflakes set from CTMH to cut out the two different sized snowflakes to decorate each letter. This die set sold out early (which I know was a bummer for most people), but wowzers! LOVE LOVE LOVE how this simple added die-cut made the whole project stand out! 

   So there you have it! What did you work on in December? Have you started any projects in the New Year? I would love to hear what you're working on! I hope you get time to get crafty this week, and until next time:

Here's to life, love, and creativity!
   

Monday, October 31, 2016

Happy Halloween!

   Happy Halloween, everyone! We love Halloween at my house, and this year we get to experience trick-or-treating with our little guy for the first time! We know he won't get it and most likely won't care, but we're excited to take him to a few of our neighbors' houses and say hello!

   Since it is Monday and Halloween, I thought I would share a couple quick and easy Halloween projects for you today. I know it might be a little late to make these now, but you can always have them in store for next year (or maybe that last minute card you wanted to make but now need it immediately)!!

   First up is a super cute paper box using CTMH Jeepers Creepers paper from the Holiday Expressions Idea Book. I made this 4x4 box using my WRMK 1-2-3 Punch Board (love this tool), and some adhesive! It was super fast and easy to do! The only difference I made was instead of using the flaps to close the box, I glued them to the sides so you could see the double-sided paper detail. I then cut the "Boo" from the CTMH Artbooking Cricut Cartridge in Tangerine cardstock. This project is perfect for holding cards, treats, and other fun little gift items.


   Inside my Boo Box I had 3 Halloween cards I made. These little guys were inspired by projects I had pinned on Pinterest a while back. I don't know who to give credit to, though, since the pins took me to other re-pins or posts.

   These cards are super simple, too, and only require scissors and a couple circle punches! I used a 1 1/2" punch for the eyes and eyelids then added 1" circles as pupils, noses, etc. I even used a 2" circle to make Dracula's hairline! Pretty sneaky, right? These were so much fun to do, and I think kids would love making them, too, on paper bags or as a banner!


   Lastly, I made this super quick and easy Halloween garland for my house. I planned on using it as a countdown, but it was too cute and I wanted to leave it up! I used the new stamp set, "Monster Crossing", and Jeepers Creepers papers, both from the Holiday Expressions Idea Book, to make the rings of this garland. I stamped the images in lines across a 12x12 paper then cut them down to 6" strips and added adhesive and a mini staple to each one to help it hold. Super easy and fast, which is definitely up my alley!


   I hope you enjoyed my Halloween projects for you today! Check back later this week to see what else I have in store for you, and until next time:

Here's to life, love, and creativity!

Tuesday, June 30, 2015

Tuesday Tidbit & Last Chance for June Specials

   Happy Tuesday to you all! I hope you're having a great day and enjoying the start to your week! Can you believe it's the last day of June?? I sure can't! I only have a month left of this pregnancy and I can hardly believe it! It's gone way too fast!

   I also can't believe that the 4th of July is this weekend! My house is still slightly under construction and in disarray for the next couple weeks, but I had to get out some festive decorations for my kitchen. Just to add a little pizazz amongst the chaos! 

   Today I want to share with you a quick and easy way to make festive 4th of July decorations this week as a last minute touch for your table arrangements, BBQ decorations, or even just because! I made these table decorations 2 years ago when I had family in town for the 4th! Since then, I have stored them away with my table linens, and get them out every year around this time to jazz up my table once again!


   Here's what you need to make this quick and easy project:

1.) Wooden Skewers
2.) Festive 4th of July paper or stamped paper
3.) Silver or White brads
4.) Washi tape or Liquid Glass
5.)  Foam tape
6.) Artiste Cricut Cartridge

   First, you cut the Accent 1 image from pg 50 of the Artiste handbook at 2 3/4" tall (height). You can cut multiple of these at one time if you are doing one for each place setting. Then cut the same image on pg 50 at 2" tall (height) from your second piece of paper or stamped background. The papers I used were old ones from my stash that I dug out!


   Next, place a brad through the center of the smaller pinwheel (the 2" one). Then add foam tape to the back of it. Adhere this pinwheel to the front of the larger pinwheel.


   Lastly, attach your pinwheels to a wooden skewer. I used thin washi tape to tape my pinwheels to the skewer. However, you could use a dab of Liquid Glass to help hold the skewer in place as well!


   I hope you enjoyed this quick Tuesday Tidbit today! If you have any questions, though, please do not hesitate to shoot me a message or comment! I would love to help you get your holidays decor ready for the weekend!

   Also, don't forget it's the last day of June which means it's the last day to take advantage of all the steals and deals June has to offer! Including the amazing My Crush promotion that gets you a FREE stamp set!


   You can see all the monthly promos under my steals and deals tab at the top of this page, and you can shop my online shop for these specials until midnight tonight! Have a great rest of your week, and until next time:

Here's to life, love, and creativity!


Thursday, June 4, 2015

Window Frame Project

   I am officially 31 weeks pregnant today! I can't believe how fast this pregnancy is going! I feel great and have no complaints. I feel very blessed so far, and hope it lasts through labor as well!

   Today I have a very special project I want to share with all of you! Back in April I had a lady I met at last fall's craft fair contact me. She was wondering if I could help her with a graduation project that she wanted to complete for her daughter's party in June. We had talked about it briefly at the craft fair last fall, and she was following up in hopes that I could be hired to design this project for her!

   I was flattered! I love doing projects for people, and this one was right up my alley! She had 2 windows with 9 panes in each. She was hoping that I could design a project so that she could showcase her daughter's photos from birth to 11th grade in each pane! She wanted a shabby chic type of feel, and she wanted to use a coral color and tiffany blue color as the many accents. She also had these burlap 8x10 boards that she was hoping to use on the back of each pane for each picture to sit on.

   So I met with her at the end of April before we left for New Orleans, and then started working on the windows a week after we got back! I finished up the final details Memorial Day weekend, and her other daughter picked them up from me last week!

   It was a little challenging trying to figure out the best way to attach the burlap boards without showing a lot of glue or adhesive from the front side, but I think I got it figured out after trying a couple things! 

   I am really pleased with how they turned out, and I wanted to share pictures* of them with all of you so you can see some of the stuff I have been working on lately!  I'm sorry if the pictures are a little blurry. It is hard to get a good picture against glass!

First Window Pane Completed
Close-up of the Name Banner I put in the upper corner of the frame. These were chipboard letters that I painted in white acrylic paint and then coated with Avery Elle Sea Glass pigment ink. To make sure the ink didn't rub off, I then coated each letter in a Matte finish Mod Podge.
Here is the first row of pictures. I used My Mind's Eye, Heidi Swapp, and Core-dinations papers for the whole project. I cut the branches and paper flowers on the Cricut using the Art Philosophy and Artiste cartridges. I then embellished the photos with brads, pearl gems, mini clothespins, Base & Bling charms, lace ribbon, and a border punch. 
Here is the second row of pictures. I tried to keep the theme similar throughout both windows, but accented and laid each pane out different for contrast! These pictures were embellished with more of the same die-cuts, pearl gems, paper doilies, hemp twine, Base & Bling charms, and some hand-stitching over vellum!
Here is the third and final row on the first window. I embellished these pictures with paper butterflies, paper flowers, pearl flourishes, lace ribbon, and a stick pin.
Here's the 2nd window completed!
Here's the burlap banner on the second window.
Here's the first row of the window at a closer view. I embellished these with similar items as the first window frame! I have pearl gems, a die-cut doily, hand-stitching, Base & Bling charms, hemp cord, and the same papers from the same lines as before!
Here is the second row of pictures. You can see that I embellished the panes very similarly between the two windows. It made it easier to tie everything together!
Here is the last row of pictures! I love the feminine feel of the whole project, and the vintage look with everything put together.
Here's a close up picture of the paper flower detail that I put on both bottom corners of the windows. I cut the rolled flowers from CTMH's Art Philosophy and Artiste cartridges, distressed the edges in Cashmere ink, rolled them using my quilling tool, and glued them together with Liquid gold (I mean glass)! Then I added some distressed branches, and some pearl finishes, and that was it! These were super fun to make!
The "titles" under each picture were stamped with White Daisy ink on chalkboard paper. Chalkboard paper isn't very porous, though, and the ink takes a long time to dry. So to make it smudge proof I embossed it with clear embossing powder and a heat gun. The two font stamp sets I used to create these titles were the "Glamour Lowercase Alphabet" and the "Artfully Sent Alphabet" both from CTMH!

   I hope you enjoyed looking at my finished project! I had a blast making it, and can't wait to hear how it's received at her graduation party in a couple weeks! If you have any questions on products used or techniques, please let me know! Otherwise, have a great rest of your week, and until next time:

Here's to life, love, and creativity!

*I was given permission by the mom to post these pictures to my social media sites.

Thursday, April 2, 2015

Creative Challenge

   Did you see this week's Creative Challenge by Close to My Heart?? Well in case you missed it you still have time to participate! So here it is:

This week’s challenge went to Senior Executive Director, Joanne Walton. Joanne is constantly creating and I knew she’d have a perfect project idea for the upcoming Easter holiday. I love the adorable banner she created. 

   This week, show us your Spring or Easter projects. We’d love to see how you celebrate! Be sure to tag your post on CTMH's Facebook and/or Instagram accounts using the hashtag ‪#‎jrlcreativechallenge‬ by midnight on Sunday, April 5th, to be entered to win a fabulous prize!


   The prizes have been amazing that CTMH gives away each week! So don't miss out! It's a great reason to get creative this week! Have fun, and until next time:

Here's to life, love, and creativity!

Friday, December 19, 2014

Day 6: Hot Chocolate Bar

    On the 6th day before Christmas CTMH gave to me an amazing idea from fellow consultant Michelle Synder! Today's crafty project comes to you from Michelle's display at Convention this past summer! She had such an amazing presentation that I felt inspired to make it a Crafty Christmas! I want to re-create this amazing display using the Magnetic Chalkboard Frame at my family get together! Without further ado, I want to share with you Michelle's Hot Chocolate Bar!

What You'll Need:

1. Cupcake Boxes
2. Magnetic Chalkboard Frame or Home Decor Frame of your choice
3. Snowhaven Complements
4. Cardstock: Cranberry, Whisper, White Daisy, Black, Kraft,
5.Slate Diagonal Ribbon
6. Whimsy Fundamentals Paper Pack (Glacier pieces)
7. Handwritten Print Alphabet stamp & White Embossing Powder
8. Cricut Collections: Artiste


Michelle used Cricut cut snowflakes and the Snowhaven Complements to accent her Home Decor Frame! You might be wondering how she received a red frame! Well simple...she spray painted it! The chicken wire pops off the back fairly easy, and then you can spray paint the frame whatever color you would like! Michelle then cut out a banner spelling out her title, backed it with cardstock, and added Slate Diagonal ribbon for detail!
For her "Hot Chocolate Bar" she used the CTMH cupcake boxes to store her goodies! One box holds the packs of cocoa, one holds bags of marshmallows, and the other holds candy cane sticks! She decorated each box with cardstock and snowflake diecuts, and added a touch of the Glacier Paper Fundamentals and some Slate Diagonal Ribbon for an added touch! I love Michelle's ideas, and think this one was super cute!
 
    Doesn't Michelle do an amazing job? I hope that her work has inspired you as much as it inspired me this holiday season! If you have any questions about Michelle's display or would like to know more about the products used, let me know! I would love to help you find everything you need to re-create this special display! Have a wonderful Friday, friends, and until next time:

Here's to life, love, and creativity!

Saturday, November 22, 2014

Cricut Weekend

   Thank goodness it's Saturday, right?? I hope you all had a wonderful week! It's been cold cold cold up here so I have spent most of the week indoors trying to stay warm!

   I also have been trying to catch up on all the projects and artwork that I want to show all of you! Do you ever start a project list?? I have a check list for projects I want to complete, and I swear it grows every day!

   The last two weeks, though, I have been able to make more creative time, and am starting to cross off projects from my crazy to-do list!

   Today I want to share with you the project we created during last week's Crafting with Cricut class! This was a super fun project to design! I knew going into my creative process that I wanted to combine Artbooking and Artfully sent on one project, but I wasn't sure how I was going to tackle that.


   I decided to use the super cute Christmas tree pop-up card from Artfully Sent, and the background and icons from the Artbooking cartridge! I paired those die-cuts with the Yuletide Carol paper pack and matching Complements to get a super cute Christmas display!

Full display layout
   I was really pleased with how this turned out, but I have to be honest. I designed and made it in less than an hour because I was sleep deprived and really didn't think about it. Sometimes I think that coming up with a new project is way easier if you stop thinking about it and just start doing. So that's what I did, and I love how it turned out!

Close-up of the tree cut from the Pop-up card from the Artfully Sent cartridge
Close-up of the deer from the Artbooking cartridge
Close-up of the top of the display layout showing the Yuletide papers and Complements

   Are you wondering how I cut the border around the Yuletide cream paper? Well let me share a little Cricut Craft Room secret.....you can take an image and choose what you want to cut from it by selecting "Hide Contour".

Close-up of the gold shimmer trim under the Artbooking overlay border


   The image I started with was the overlay from the travel mini-album on the Artbooking cartridge! Then I selected "Hide Contour", and selected all the clouds and airplanes to tell CCR not to cut them. This left me with just the border to cut out! I love this trick! Definitely try this....the possibilities are endless!


Overlay I started with in CCR
Select the image and the "Hide Contour" button will show up on the bottom left-side
When you select the images you don't want to cut they show up grey. Then when you hit exit, the images will fill in solid and not cut. This is my favorite trick ever!
Display layout in the Colonial White Shadow Box frame from Close to My Heart

   Isn't this the best?? If you like this tip, you should sign up for my Candid Cricut Club and attend my next Crafting with Cricut class! We get to play with fun tips and tricks like this every time! It's the best!

   If you have any questions, please let me know! I would love to help you make this fun shadow box display for yourself! Have a great rest of your day and enjoy your weekend! I hope you get time to be crafty this weekend, and until next time:

Here's to life, love, and creativity!

Saturday, November 1, 2014

Brrrr....November's Here

   I hope you all are staying warm on the 1st day of November! Brrr brr brr! We haven't had any snow like some of you, but I know it's coming.....and all too soon!

   Last night's trick-or-treating went really well! We were told our house was the "best" in the neighborhood, and second best in Hastings (although we didn't get to see the "spook house" to see which one some kids were calling the best)! It was cold, but most of the kids came out early and went home before 8pm. We definitely didn't have as many kids as we usually do , but we still had a decent turn out (maybe a little less than 100 kids)!


   We had the outdoor speakers set up, too, and played spooky music during the trick-or-treating! It was super fun! I didn't get all the little things done that I wanted to for decorating, but it still turned out pretty awesome! 

   Well with a new month upon us I have a ton of amazing things to share with you: new specials, new products, giveaways, and so much more! Let's jump right in, shall we?
  

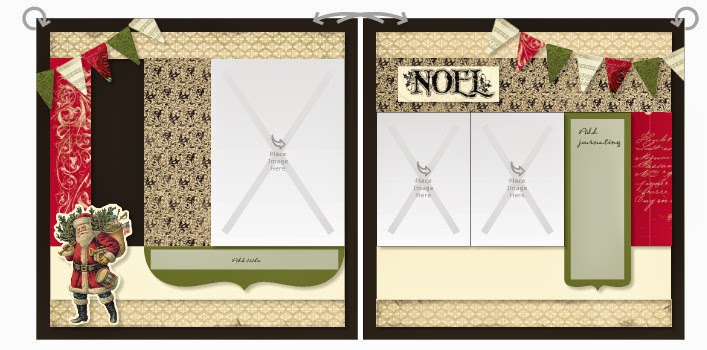
November Stamp-of-the-Month: It's the Little Things!


   A new month means a new SOTM! This month's SOTM is called "It's the Little Things", and it features perfect images to layer, fussy cut, and create backgrounds on all your projects! I love how versatile this stamp set is and how simple and beautiful the handwritten phrases are on this set!

   This stamp set is only $5 with any $50 purchase this month! Check out some of the SOTM artwork to get inspired:

Card scraplifted from Vicki Wizniuk of Wizard's Hangout.

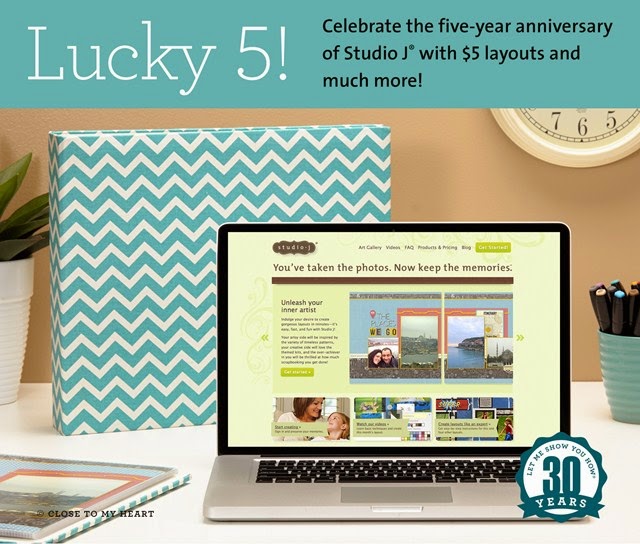
Studio J Anniversary Sale!!!


   November marks the five-year anniversary of Studio J, CTMH's digital memory keeping program, and that means it’s your lucky month! There are five amazing ways to win through Studio J and Close To My Heart social media this month!
 

5 LUCKY WAYS TO WIN BIG:  

1.) Throughout the month of November, all layouts purchased in Studio J are only $5! That's over 25% off!


2.) Your second chance to win big must come by sheer luck: every fifth order placed in Studio J during November receives a FREE surprise Close To My Heart accessory in its shipping box! The accessory has a retail value of $5 or more!
Could be any accessory! Surprises are so fun aren't they???
 
3.) If luck doesn’t smile on you in that way, you might stumble upon it by finding a little extra something in your Studio J box. Five “golden tickets” will be sent out during the month of November with randomly selected Studio J print orders! This “golden ticket” is redeemable for one of Close To My Heart’s new D-ring albums* loaded with 10 Top Load Memory Protectors. 

4.) For a fourth way to win, simply create new, gorgeous layouts in Studio J, select your favorites, and then post pictures of them on Close To My Heart’s Facebook page using the hashtag #ctmhlucky5. After November 30, five lucky winners will be selected from the entries based on their artistry and creativity. Each of these winners will receive their own D-ring album loaded with 10 Top Load Memory Protectors!

 
5.) The last way to win is to take your new Studio J artwork and post a picture of it on Instagram using the hashtag #ctmhlucky5. Just as it is with Facebook, after November 30, five lucky winners will be selected from the entries to receive their own D-ring album loaded with 10 Top Load Memory Protectors!
    And to make things even more exciting, starting November 1, five brand new kits from the Annual Inspirations Idea book will be made available in Studio J, so you can create new artwork using the latest papers and embellishments from Close To My Heart. With so many ways to win, five may be your new lucky number! Log in to Studio J and start creating today!!!
*Offer valid November 1–30, 2014. Pattern and color of new D-ring album to be given to winners will be at Close To My Heart’s discretion based upon availability. New kits available in Studio J® on November 1 include Confetti Wishes, Snowhaven, Seaside, Pathfinding, and Scaredy Cat. No tax or shipping will be charged on the free item(s). Studio J layouts ship in a protected box that can hold 4 to 50 two-page layouts.

Close to My Heart 's Clearance Items now Updated: 


CTMH just released new products in their While Supplies Last section! Shop early and shop fast for the best selection because these new items will not last long!

Shop these items and more in my Online Store!!!


New Products in November: 

   This month is jam packed with so many awesome new things! Not only are there new Steals and Deals this month, but there are also new products! Starting this month you can take advantage of being one of the first to get these newly released products:


Picture My Life A la Carte:

      
   Starting November 1st you can now get any of the Picture My Life kits a la carte style! This means you can purchase just the pack of 4x6 and 3x4 cards without having to get the page protectors and cover page, too!

   The new a la carte option includes 122 pre-printed, beautiful cards in both 4x6 and 3x4 sizes, and is only $14.95!!! Check out all the Picture My Life kits and cards on Candid Crafter's Online Shopping Site today! 


New Albums in D-ring and Post Bound Styles:


   They are finally approved and being shipped for availability as we speak! The brand new CTMH albums are gorgeous and the perfect addition to the memory keeping family! I think you all are going to love these! There are 3 new designs to choose from: Lagoon Chevron, Ruby Floral, and Black! They are all canvas covered, 1 1/2" non-expandable, durable albums that are sure to excite any memory keeper's style! 

   I do not have an official release date yet, but CTMH has assured us that they will be available for purchase this month! So keep your eyes open and check back here often for updates!


Organizational Must-Haves:


   Starting in mid-November, CTMH is releasing a brand-new rolling tote and matching shoulder bag for all your organizational needs! I cannot wait to get my hands on these awesome new additions!

   The rolling tote is designed to store the CTMH Organizers in the center, 12x12 products in the front pocket, and other small tools, adhesives, and products in the side pockets! However, the possibilities are endless! It's durable material and functional storage make it the perfect addition for crafting on the go!

 
   The shoulder bag complements the rolling tote perfectly! It has the same style and durable material, but in a shoulder bag option! It's big enough to fit all your 12x12 projects, kits, and books, but also has room to store your embellishments, tools, and so much more! This super cute bag will be available at the same time the rolling tote is available, and believe me.....you're going to want both!


Upcoming Workshops, Classes, & Crops:


Christmas Card Buffet Part II

    
   Back by popular demand....the Christmas Card Buffet is here and with new cards added! Come create as many Christmas cards (fall, everyday, and spring ones, too) as you can in 2 hours for only $12!!!

    This awesome workshop will be on November 5th from 12-2pm or 6-8pm! You can sign up for whichever works with your schedule!

    I am suggesting that each regular attendee bring their own "Basic Workshop Kit" with them since I have limited supplies. A list of the "Basic Workshop Kit" can be found on my blog and on the event page (or you can contact me with questions)!

   Please RSVP NOW for the return of this fun and exciting workshop! Feel free to invite friends and family, but please make sure they RSVP, too! This is a popular workshop, and will fill up fast!


Regina Craft Fair: 


   I will have a booth at the Regina Craft Fair the weekend of November 13-15th! I will be there from 7AM-4PM on Thursday and Friday, and from 9AM-4PM on Saturday!

   I will be selling homemade paper crafts like Christmas cards, home decor, mini albums, and lots of other fun goodies! I will also have some of most recent projects on display to show off upcoming workshops and classes!

   The Craft Fair is located in the Chapel Lobby at 1175 Nininger Road in Hastings, MN, and is FREE to attend! So come stop by and see me and check out all the fun projects I have!


Crafting with Cricut


   The next Crafting with Cricut Class will be November 14th from 6:30-8:30pm at my house in Hastings, MN! We will be exploring and combining Artbooking and Artfully Sent in this exciting new workshop!

   Please bring your Cricut Expression, laptop, cords and plug-ins, Cricut mat, Cricut spatula, adhesive of your choice, and a pair of scissors! A complete supply list will be updated on the Facebook page closer to the class!

   This class will fill up quickly so please RSVP by November 7th to save your seat! I can't wait to see you there!


Seasonal Expressions I Preview Party:


   It's almost here! The Seasonal Expressions Idea Book is set to release December 1st, but here's your chance to get a glimpse at this amazing new supplemental book before it goes live to the public!

   This book has 40 pages packed with all new products, tools, and fun new collections! You're going to LOVE all the new items this book has to offer!

   The Seasonal Expressions Preview Party will be November 19th from 12-2pm and again from 6-8pm at my house in Hastings, MN! This event is FREE and will showcase the new products, show off fun new artwork, and will have a FREE make-n-take featuring the new products from the book!

   You definitely do not want to miss this special event! Invite your friends and family along, too! Tis the season to be sharing! I can't wait to see you all there!

   Please RSVP by November 12th to get your preview spot set!!


   Whew!!! I think that's everything! November is an awesome month, and you definitely do not want to miss out on any of the amazing things going on this month! Let me know if you have any questions or need assistance placing your CTMH orders this month!

   Have a great weekend, everyone, and until next time:

Here's to life, love, and creativity!